Sign In
Upload
Manuals
Brands
Sony Manuals
Camcorder
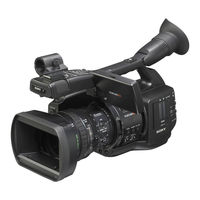
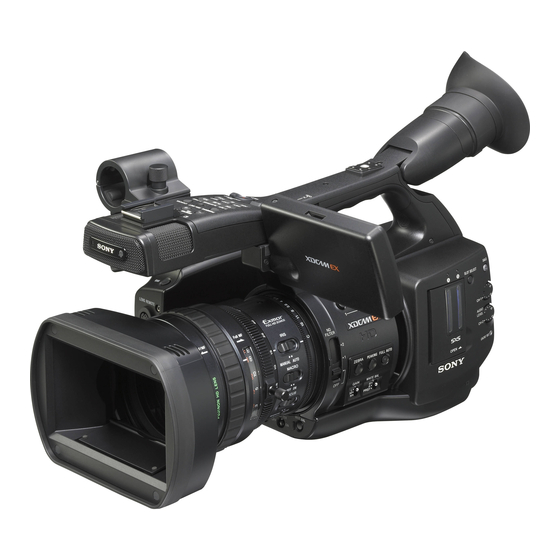
PMW-EX1R
Sony PMW-EX1R Manuals
Manuals and User Guides for Sony PMW-EX1R. We have
7
Sony PMW-EX1R manuals available for free PDF download: Manuel Du Propriétaire, Operating Instructions Manual, Service Manual, Brochure & Specs, Getting Started
Sony PMW-EX1R Operating Instructions Manual (175 pages)
Solid-State Memory Camcorder
Brand:
Sony
| Category:
Camcorder
| Size: 6.48 MB
Table of Contents
Table of Contents
6
Overview
12
Package Configuration
12
Features
13
Using the Software
16
Reading the CD-ROM Manuals
16
Parts Identifications
17
Camcorder
17
IR Remote Commander (Supplied)
21
On-Screen Indications
22
Indications in Camera Mode
22
Direct Menu Operation
23
Preparations
25
Power Supply
25
Using a Battery Pack
25
Using AC Power (DC in Power)
26
Turning Power on
27
Turning Power off
27
Setting the Clock
28
Adjusting the LCD Monitor and Viewfinder
29
Adjusting the LCD Monitor
29
Adjusting the Viewfinder
30
Adjusting the Grip
31
Using the IR Remote Commander
32
Handling Sxs Memory Cards
33
About Sxs Memory Cards
33
Inserting/Removing an Sxs Memory Card
34
Switching between Sxs Memory Cards
35
Formatting an Sxs Memory Card
35
Checking the Remaining Time Available for Recording
36
Restoring an Sxs Memory Card
36
Using an External Hard Disk
37
Attaching/Removing the PHU-120R
37
Formatting the PHU-120R
38
Checking the Remaining Time Available for Recording
39
Restoring the PHU-120R
39
Using a Media Adaptor
40
Formatting
40
Recording
41
Basic Operation Procedure
41
Selecting the Video Format
43
Selectable Formats
43
Switching between HD and SD
44
Changing the Format
45
Switching the ND Filters
45
Adjusting the White Balance
46
Selecting the Adjustment Mode
46
Executing Auto White Balance
47
Displaying the Markers and Zebra Patterns
48
Displaying the Markers
48
Displaying the Zebra Patterns
49
Setting the Gain
50
Recording with Fixed Gain
50
Recording in AGC Mode
50
Setting the Electronic Shutter
51
Shooting in a Fixed Shutter Mode
51
Shooting in EX Slow Shutter Mode
52
Shooting in Auto Shutter Mode
52
Adjusting the Iris
53
Recording in Auto Iris Mode
53
Adjusting the Iris Manually
53
Adjusting the Zoom
54
Switching the Zoom Mode
54
Operating the Zoom Manually
54
Using the Power Zoom
54
Adjusting the Focus
56
Adjusting in Full MF Mode
56
Adjusting in MF Mode
57
Adjusting in AF Mode
58
Using Macro Mode
59
Eliminating Picture Blurring (Steady Shot)
59
Reducing Flickers
60
Setting the Time Data
61
Running Modes of the Timecode
61
Setting the Timecode
61
Setting the User Bits
62
Displaying the Time Data
62
Recording Audio Signals
63
Using the Built-In Stereo Microphones
64
Using External Inputs
64
Using an External Microphone
64
Adjusting the Audio Recording Levels
64
Monitoring the Audio
65
Outputting the Color Bars and Reference Tone
66
Recording Shot Marks
66
Adding the OK Mark
67
Rec Review
68
Changing Functions of the Assignable Buttons
69
Interval Recording
70
Preparatory Settings
70
Performing Interval Recording
70
Frame Recording
71
Preparatory Settings
71
Performing Frame Recording
72
Picture Cache Recording
73
Preparatory Settings
73
Performing Picture Cache Recording
73
Slow & Quick Motion Recording
74
Preparatory Settings
74
Recording in Slow & Quick Motion Mode
75
Freeze MIX: Image Alignment
76
Shot Transition
77
Preparatory Settings
78
Recording with a Shot Transition
79
Fader Function
81
Preparatory Settings
81
Starting Recording with a Fade in
82
Ending Recording with a Fade out
82
Picture Profiles
83
Registering the Customized Settings as a Picture Profile
83
Selecting a Picture Profile
84
Copying the Settings of a Picture Profile
84
Resetting a Picture Profile
85
Storing a Picture Profile on an Sxs Memory Card
85
Picture Profile Items
87
Deleting Clips
92
Deleting the Last Recorded Clip
92
Deleting Clips Collectively
92
Storing/Retrieving the Setting Data
93
Storing the Setup File
93
Retrieving the Setup File
93
Resetting to the Standard Values
93
Operating Planning Metadata
94
Loading a Planning Metadata File
94
Defining a Clip Name in Planning Metadata
95
Defining Shot Mark Names in Planning Metadata
97
Copying Planning Metadata Files Collectively
97
Playback
98
Thumbnail Screens
98
Configuration of the Thumbnail Screen
98
Changing the Type of Thumbnail Screen
100
Playing Back Clips
101
Playing Back the Selected and Subsequent Clips in Sequence
101
Monitoring Audio
102
Switching to High-Speed Playback
102
Cueing up
103
Adding Shot Marks During Playback (HD Mode)
103
Clip Operations
104
Clip Operation Menus
104
Basic Operations of the Clip Operation Menus
105
Displaying the Detailed Information of a Clip
106
Adding/Deleting the OK Mark To/From a Clip (HD Mode Only)
107
Copying Clips
107
Deleting Clips
108
Displaying the EXPAND CLIP Screen
109
Displaying the SHOT MARK Screen (HD Mode Only)
110
Adding/Deleting Shot Marks (HD Mode Only)
111
Changing the Index Frame (HD Mode Only)
112
Dividing a Clip (HD Mode Only)
112
Showing the Status Screens
113
CAMERA Status Screen
114
AUDIO Status Screen
115
In Camera Mode
115
In Media Mode
115
VIDEO Status Screen
116
BUTTON/REMOTE Status Screen
116
BATTERY/MEDIA Status Screen
117
Overview of the Setup Menus
118
Setup Menu Configuration
118
Setup Menu Layers
118
Basic Menu Operations
119
Setup Menu List
122
CAMERA SET Menu
122
AUDIO SET Menu
127
VIDEO SET Menu
128
LCD/VF SET Menu
129
TC/UB SET Menu
132
OTHERS Menu
133
Connecting External Monitors
139
Operating Clips with a Computer
141
Connecting an External Device (I.link Connection)
143
Recording the Camcorder Picture on an External Device
143
Nonlinear Editing
144
Recording External Input Signals
144
About I.link
146
Important Notes on Operation
147
Formats and Limitations of Outputs
149
Video Formats and Output Formats
149
Limitations of Outputs
154
Backup Battery
158
Troubleshooting
159
Operating Power
159
Recording/Playback
159
External Devices
160
Error/Warning Indications
161
Error Indications
161
Warning Indications
161
MPEG-2 Video Patent Portfolio License
164
About Bitmap Fonts
164
Specifications
165
General
165
Camera Block
165
Audio Block
166
Displays
166
Media Block
167
Inputs/Outputs
167
Optional Accessories
167
Index
169
Advertisement
Sony PMW-EX1R Operating Instructions Manual (168 pages)
Solid-State Memory Camcorder
Brand:
Sony
| Category:
Camcorder
| Size: 5.97 MB
Table of Contents
Operating Instructions
1
Table of Contents
6
Overview
12
Package Configuration
12
Features
13
Using the Software
16
Reading the CD-ROM Manuals
16
System Requirements for Using the Applications
16
Software Installation
17
Parts Identifications
18
Camcorder
18
IR Remote Commander (Supplied)
22
On-Screen Indications
23
Indications in Camera Mode
23
Direct Menu Operation
24
Preparations
26
Power Supply
26
Using a Battery Pack
26
Using AC Power (DC in Power)
27
Turning Power on
28
Turning Power off
28
Setting the Clock
29
Adjusting the LCD Monitor and Viewfinder
30
Adjusting the LCD Monitor
30
Adjusting the Viewfinder
31
Adjusting the Grip
32
Using the IR Remote Commander
33
Handling Sxs Memory Cards
34
About Sxs Memory Cards
34
Inserting/Removing an Sxs Memory Card
35
Switching between Sxs Memory Cards
36
Formatting an Sxs Memory Card
36
Checking the Remaining Time Available for Recording
37
Restoring an Sxs Memory Card
37
Using an External Hard Disk
38
Attaching/Removing the PHU-60K/120K/120R
38
Formatting the PHU-60K/120K/120R
39
Checking the Remaining Time Available for Recording
40
Restoring the PHU-60K/120K/120R
40
Using a "Memory Stick" with the Media Adaptor
41
Formatting a "Memory Stick
41
Recording
42
Basic Operation Procedure
42
Selecting the Video Format
44
Selectable Formats
44
Switching between HD and SD
45
Changing the Format
46
Switching the ND Filters
47
Adjusting the White Balance
47
Selecting the Adjustment Mode
47
Executing Auto White Balance
48
Displaying the Markers and Zebra Patterns
49
Displaying the Markers
49
Displaying the Zebra Patterns
50
Setting the Gain
51
Recording with Fixed Gain
51
Recording in AGC Mode
52
Setting the Electronic Shutter
52
Shooting in a Fixed Shutter Mode
52
Shooting in EX Slow Shutter Mode
54
Shooting in Auto Shutter Mode
54
Adjusting the Iris
54
Recording in Auto Iris Mode
54
Adjusting the Iris Manually
55
Adjusting the Zoom
55
Switching the Zoom Mode
55
Operating the Zoom Manually
56
Using the Power Zoom
56
Adjusting the Focus
57
Adjusting in Full MF Mode
57
Adjusting in MF Mode
58
Adjusting in AF Mode
59
Using Macro Mode
60
Eliminating Picture Blurring (Steady Shot)
60
Reducing Flickers
61
Setting the Time Data
62
Running Modes of the Timecode
62
Setting the Timecode
62
Setting the User Bits
63
Displaying the Time Data
63
Recording Audio Signals
64
Using the Built-In Stereo Microphones
65
Using External Inputs
65
Using an External Microphone
65
Adjusting the Audio Recording Levels
65
Monitoring the Audio
66
Outputting the Color Bars and Reference Tone
67
Recording Shot Marks
67
Adding the OK Mark
68
Rec Review
69
Changing Functions of the Assignable Buttons
70
Interval Recording
71
Preparatory Settings
71
Performing Interval Recording
71
Frame Recording
72
Preparatory Settings
72
Performing Frame Recording
73
Picture Cache Recording
74
Preparatory Settings
74
Performing Picture Cache Recording
74
Slow & Quick Motion Recording
75
Preparatory Settings
75
Recording in Slow & Quick Motion Mode
76
Freeze MIX: Image Alignment
77
Shot Transition
78
Preparatory Settings
79
Recording with a Shot Transition
80
Fader Function
82
Preparatory Settings
82
Starting Recording with a Fade in
83
Ending Recording with a Fade out
83
Picture Profiles
84
Registering the Customized Settings as a Picture Profile
84
Selecting a Picture Profile
84
Copying the Settings of a Picture Profile
85
Resetting a Picture Profile
85
Storing a Picture Profile on an Sxs Memory Card
85
Picture Profile Items
87
Deleting Clips
92
Deleting the Last Recorded Clip
92
Deleting Clips Collectively
92
Storing/Retrieving the Setting Data
93
Storing the Setup File
93
Retrieving the Setup File
93
Resetting to the Standard Values
93
Playback
94
Thumbnail Screens
94
Configuration of the Thumbnail Screen
94
Changing the Type of Thumbnail Screen
96
Playing Back Clips
97
Playing Back the Selected and Subsequent Clips in Sequence
97
Monitoring Audio
98
Switching to High-Speed Playback
98
Cueing up
99
Adding Shot Marks During Playback (HD Mode)
99
Clip Operations
100
Clip Operation Menus
100
Basic Operations of the Clip Operation Menus
101
Displaying the Detailed Information of a Clip
102
Adding/Deleting the OK Mark To/From a Clip (HD Mode Only)
103
Copying Clips
103
Deleting Clips
104
Displaying the EXPAND CLIP Screen
105
Displaying the SHOT MARK Screen (HD Mode Only)
106
Adding/Deleting Shot Marks (HD Mode Only)
107
Changing the Index Frame (HD Mode Only)
107
Dividing a Clip (HD Mode Only)
108
Status Displays
109
Showing the Status Screens
109
CAMERA Status Screen
110
AUDIO Status Screen
111
In Camera Mode
111
In Media Mode
111
VIDEO Status Screen
112
BUTTON/REMOTE Status Screen
112
BATTERY/MEDIA Status Screen
113
Overview of the Setup Menus
114
Setup Menu Configuration
114
Setup Menu Layers
114
Basic Menu Operations
115
Setup Menu List
118
CAMERA SET Menu
118
AUDIO SET Menu
123
VIDEO SET Menu
124
LCD/VF SET Menu
125
TC/UB SET Menu
128
OTHERS Menu
129
Connecting External Monitors
134
Operating Clips with a Computer
136
Connecting an External Device (I.link Connection)
138
Recording the Camcorder Picture on an External Device
138
Nonlinear Editing
139
Recording External Input Signals
139
About I.link
140
Important Notes on Operation
142
Formats and Limitations of Outputs
144
Video Formats and Output Formats
144
Limitations of Outputs
149
Backup Battery
153
Troubleshooting
154
Operating Power
154
Recording/Playback
154
External Devices
155
Error/Warning Indications
156
Error Indications
156
Warning Indications
156
MPEG-2 Video Patent Portfolio License
159
Specifications
159
General
159
Camera Block
160
Audio Block
161
Displays
161
Media Block
161
Inputs/Outputs
161
Optional Accessories
162
Index
163
Sony PMW-EX1R Service Manual (108 pages)
SOLID-STATE MEMORY CAMCORDER WIDE CONVERSION LENS VCL-EX0877
Brand:
Sony
| Category:
Camcorder
| Size: 4.75 MB
Table of Contents
Table of Contents
5
Manual Structure
7
Purpose of this Manual
7
Related Manuals
7
Service Overview
9
External Connectors
9
Signal Inputs and Outputs
9
Location of the Printed Wiring Boards
11
Circuit Description
12
Service Tools/Measuring Equipment List
20
Service Tools
20
Measuring Equipment
20
Firmware Upgrade
21
Recommended Replacement Parts
22
Circuit Protection Part List
23
Circuit Protection Element
23
Replacing Fuse
23
Note on Service
24
Requirements on Replacement of Boards or Parts
24
Requirements on Replacement of Lens
24
Note on Replacement of Parts on the Board
24
Description of Number Seal on the Prism
24
Memory Backup Battery
25
Unleaded Solder
25
Connector Location Diagram on Board
26
Connecting/Disconnecting the Flexible Card Wire
27
Replacing the Coaxial Cable with Connector
28
Replacement of Main Parts
29
Outline of Replacement Procedures
29
Replacement Procedures
30
Lithium Battery
30
Case (Bottom) L/R and Front Panel Assembly
30
Microphone Holder Assembly
32
EVF Assembly
32
Handle Assembly
33
SW-1478 Board
36
Inside Panel Assembly/Outside Panel Assembly
36
Rear Panel Assembly
38
Express Card Assembly
39
Board and RE-273 Board
40
Battery Case, TX-131 Board
41
Board
43
Case L Assembly
44
Case R
45
Prism Assembly
46
ND Filter
46
Lens Unit
47
Board
47
Board
48
Speaker
48
Board, HN-361 Board
49
Microphone Unit Assembly
50
Microphone Unit
51
Board
52
Inch LCD Assembly
53
SERVICE Menu
55
Outline of SERVICE Menu
55
Basic Menu Operations
55
SERVICE Menu Structure
55
Displaying the SERVICE Menu
55
SERVICE Menu List
56
MAINTENANCE Menu
56
RPN CORRECT Menu
56
INFORMATION Menu
57
Self-Diagnostic Function
58
Executing Log Dump
63
List of Error Numbers on the LCD Display
64
Alignment
65
Servicing Software "Servicenavi-EX
65
Preparation
65
Service Tools and Equipment
65
Connection
65
MAINTENANCE Menu
65
Test Saw Setting
65
Executing Auto Black Balance
66
Black Shading Adjustment
66
Adjustment Procedure
67
White Shading Adjustment
67
Flare Adjustment
69
Executing Auto FB Adjust
70
RPN CORRECT Menu
72
Executing Auto Detection
72
Correction Mode Settings
72
Channel Setting
72
Cursor Setting
72
Cursor H Position Setting
73
Cursor V Position Setting
73
Operating Cursor Next
73
Operating Cursor Prev
73
Compensation Level Display
73
Executing Record
73
Executing Delete
74
Readout Mode Setting
74
Executing Reset
74
Spare Parts
75
Notes on Repair Parts
75
Exploded Views
76
Schematic Diagrams
105
Frame Wiring
105
Advertisement
Sony PMW-EX1R Brochure & Specs (35 pages)
XDCAM EX Family
Brand:
Sony
| Category:
Camcorder
| Size: 5.67 MB
Table of Contents
Long Recording Time
4
Low Power Consumption
6
Native Recording
7
Selectable Peaking
7
Four-Channel Audio
8
Scene File System
9
Wide Choice of Optional Microphones
9
Camera Remote Control
10
Top View
11
Connector Panel
11
Optical Image Stabilizer
15
Expanded Focus
15
Operational Versatility
17
Other Features
18
Optional Accessories
24
Sony PMW-EX1R Brochure & Specs (6 pages)
Sony Camcorder
Brand:
Sony
| Category:
Camcorder
| Size: 0.63 MB
Sony PMW-EX1R Getting Started (3 pages)
Brand:
Sony
| Category:
Camcorder
| Size: 0.06 MB
(French) Sony PMW-EX1R Manuel Du Propriétaire (180 pages)
Solid-State Memory Camcorder
Brand:
Sony
| Category:
Camcorder
| Size: 6.44 MB
Table of Contents
Table of Contents
3
Contenu de L'emballage
9
Caractéristiques
10
Utilisation du Logiciel
13
Lecture des Manuels CD-ROM
13
Configuration Système Requise Pour L'utilisation des Applications
14
Installation du Logiciel
14
Identifications des Pièces
15
Caméscope
15
Télécommande Infrarouge (Fournie)
20
Indications À L'écran
21
Indications en Mode Caméra
21
Utilisation du Menu Direct
22
Sources D'alimentation
24
Utilisation D'un Pack de Batteries
24
Utilisation de L'alimentation Secteur (Alimentation DC IN)
26
Mise Sous Tension
26
Mise Hors Tension
26
Réglage de L'horloge
27
Réglage du Moniteur LCD Et du Viseur
29
Réglage du Viseur
30
Réglage de la Poignée
31
Utilisation de la Télécommande Infrarouge
32
Utilisation des Cartes Mémoire Sxs
33
Au Sujet des Cartes Mémoire Sxs
33
Insertion/Retrait D'une Carte Mémoire Sxs
35
Sélection Alternative des Cartes Mémoire Sxs
36
Formatage D'une Carte Mémoire Sxs
36
Contrôle du Temps D'enregistrement Restant
36
Restauration D'une Carte Mémoire Sxs
37
Utilisation D'un Disque Dur Externe
38
Raccordement/Retrait du PHU-60K/120K/120R
38
Formatage du PHU-60K/120K/120R
39
Contrôle du Temps D'enregistrement Restant
39
Restauration du PHU-60K/120K/120R
40
Utilisation D'un « Memory Stick " Avec L'adaptateur de Support
40
Formatage D'un « Memory Stick
40
Procédure D'utilisation de Base
42
Sélectionner Le Format VIDéo
44
Formats Sélectionnables
44
Basculer entre HD Et SD
45
Changer Le Format
46
Basculer D'un Filtre ND À un Autre
47
Ajuster la Balance des Blancs
47
Sélectionner Le Mode de Réglage
48
Exécuter la Balance des Blancs Automatique
48
Afficher Les Marqueurs Et Les Motifs Zèbre
49
Afficher Les Motifs Zèbre
50
Régler Le Gain
51
Enregistrer Avec Gain Fixe
51
Enregistrer en Mode AGC
52
Régler L'obturateur Électronique
53
Prise de Vue en Mode Obturateur Fixe
53
Mode Obturateur Automatique
53
Prise de Vue en Mode Obturateur Lent Étendu
54
Prise de Vue en Mode Obturateur Automatique
55
Régler Le Diaphragme
55
Enregistrer en Mode Diaphragme Automatique
55
Mode Diaphragme Manuel
55
Régler Le Diaphragme Manuellement
56
Régler Le Zoom
57
Basculer D'un Mode Zoom À L'autre
57
Actionner Le Zoom Manuellement
57
Utiliser Le Zoom Motorisé
57
Mode Zoom Manuel
57
Mode Zoom Motorisé (Servo)
57
Régler la Mise Au Point
59
Régler en Mode Full MF
59
Régler en Mode MF
60
Ajuster en Mode AF
61
Mise Au Point
61
Mise Au Point Automatique Par Simple
61
Utiliser Le Mode Macro
62
Eliminer Le Flou (Prise de Vue Stable)
62
Réduire Le Scintillement
63
Régler Les Données Temporelles
64
Modes de Fonctionnement du Code Temporel
64
Régler Le Code Temporel
64
Mode Regen
64
Mode Clock
64
Régler Les Bits D'utilisateur
65
Afficher Les Données Temporelles
66
Enregistrer des Signaux Audio
66
Utilisation des Microphones Stéréo Intégrés
67
Utiliser des Entrées Externes
67
Utiliser un Microphone Externe
67
Régler Les Niveaux D'enregistrement Audio
67
Contrôler L'audio
68
Emettre Les Barres de Couleur Et la Tonalité de Référence
69
Enregistrer des Repères de Prise de Vue
70
Ajout de la Marque OK
71
Rec Review
72
Changer Les Fonctions des Boutons Assignables
73
Enregistrement À Intervalles
74
Réglages Préparatoires
75
Effectuer un Enregistrement À Intervalles
75
Enregistrement Cadre Par Cadre
76
Réglages Préparatoires
76
Effectuer un Enregistrement Cadre Par Cadre
76
Enregistrement Dans la Mémoire Cache des Images
77
Réglages Préparatoires
77
Exécution D'un Enregistrement Dans la Mémoire Cache des Images
78
Enregistrement Ralenti Et Accéléré
79
Enregistrer en Mode Ralenti Et Accéléré
80
Réglages Préparatoires
80
Mixage D'images Gelées : Alignement D'images
81
Transition de Prise de Vue
82
Réglages Préparatoires
83
Enregistrement Avec Une Transition de Prise de Vue
85
Fonction Fondu
87
Réglages Préparatoires
87
Commencer un Enregistrement Par un Fondu Entrant
88
Terminer un Enregistrement Par un Fondu Sortant
88
Profil D'image
89
Sélectionner un Profil D'image
89
Profils D'image
89
Copier Les Réglages D'un Profil D'image
90
Reconfigurer un Profil D'image
90
Mémorisation D'un Profil D'image Sur Une Carte Mémoire Sxs
90
Options de Profil D'image
92
Low Key Sat
97
Suppression du Dernier Plan Enregistré
99
Suppression Collective de Plans
99
Suppression de Plans
99
Mémoriser Le Fichier de Configuration
100
Rappeler Le Fichier de Configuration
100
Mémoriser/Rappeler Les Données de Réglage
100
Lecture
100
Reconfigurer Les Valeurs Standard
101
Configuration de L'écran de Vignettes
102
Ecrans de Vignette
102
Changement du Type D'écran de Vignettes
104
Lecture des Plans Dans L'ordre À Partir du Premier Sélectionné
105
Lecture de Plans
105
Surveillance de L'audio
106
Passage en Lecture Accélérée
106
Navigation
107
Opérations Sur Les Plans
108
Menus des Opérations Sur Les Plans
108
Opérations de Base des Menus D'opérations Sur Les Plans
109
Affichage des Informations Détaillées D'un Plan
110
Copie de Plans
111
Suppression de Plans
112
Jpan0011 ( 1 )
113
Affichage de L'écran EXPAND CLIP
113
Jan /2009 10
114
Tcr 00 : 05 : 00
114
Affichage de L'écran SHOT MARK (Mode HD Seulement)
114
Jpan0011 ( 1 )
115
Jan / 2009 10
115
Ajout/Suppression de Repères de Prise de Vue (Mode HD Seulement)
115
Division D'un Plan (Mode HD Seulement)
116
Affichage des Écrans D'état
118
Ecran D'état CAMERA
119
Ecran D'état AUDIO
120
En Mode Caméra
120
En Mode Supports
120
Ecran D'état VIDEO
121
Ecran D'état BUTTON/REMOTE
122
Ecran D'état BATTERY/MEDIA
122
Présentation des Menus de Configuration
123
Accès Aux Menus de Configuration
123
Niveaux des Menus de Configuration
123
Opérations de Base des Menus
124
Liste des Menus de Configuration
128
Menu CAMERA SET
128
Interval Rec
130
Menu AUDIO SET
134
Menu VIDEO SET
135
Menu LCD/VF SET
136
Menu TC/UB SET
139
Menu OTHERS
140
Raccordement de Périphériques Externes
145
Utilisation des Plans Avec un Ordinateur
147
Raccordement D'un Périphérique Externe (Raccordement I.link)
149
Enregistrement de L'image du Caméscope Sur un Périphérique Externe
150
Montage Non Linéaire
150
Enregistrement de Signaux D'entrée Externes
151
A Propos D'I.link
152
Remarques Importantes Relatives À L'utilisation
153
Formats Et Limitations des Sorties
155
Formats VIDéo Et Formats de Sortie
155
Limitations des Sorties
160
Pile de Secours
164
Dépannage
165
Alimentation
165
Enregistrement/Lecture
165
Dispositifs Externes
166
Messages D'erreur/Avertissements
167
Licence MPEG-2 Video Patent Portfolio
170
Spécifications
170
Caractéristiques Générales
170
Bloc Caméra
171
Bloc Audio
172
Affichages
172
Bloc Supports
172
Entrées/Sorties
172
Moniteur Lcd
172
Accessoires en Option
173
Index
175
Advertisement
Related Products
Sony XDCAM EX PMW-EX3
Sony PMW-EX350
Sony PMW-EX280
Sony EXMOR PMW-EX1
Sony PMW-EX260
Sony XDCAM EX PMW-EX30
Sony PMW-350
Sony PMW-350K
Sony HANDYCAM PMW-320L
Sony XDCAM PMW-1000
Sony Categories
Laptop
TV
CD Player
Camcorder
Digital Camera
More Sony Manuals
Login
Sign In
OR
Sign in with Facebook
Sign in with Google
Upload manual
Upload from disk
Upload from URL