Sign In
Upload
Manuals
Brands
Sony Manuals
Camcorder
Handycam DCR-DVD100
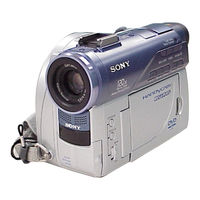
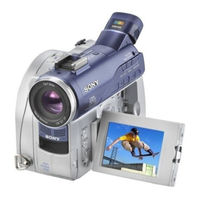
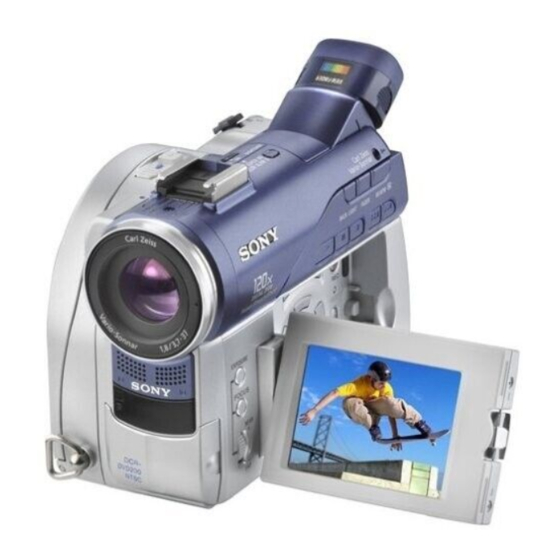
Sony Handycam DCR-DVD100 Manuals
Manuals and User Guides for Sony Handycam DCR-DVD100. We have
5
Sony Handycam DCR-DVD100 manuals available for free PDF download: Operating Instructions Manual, Service Manual, Technology Handbook
Sony Handycam DCR-DVD100 Service Manual (174 pages)
Digital Video Camera Recorder
Brand:
Sony
| Category:
Camcorder
| Size: 8.38 MB
Table of Contents
Table of Contents
4
Specifications
2
Service Note
6
Power Supply During Repairs
6
To Take out a Cassette When Not Eject
6
Notes on Handling the Optical Pick-Up
6
Precaution for Checking Emission
6
Of Laser Diode
6
Self-Diagnosis Function
7
Self-Diagnosis Display
7
Self-Diagnosis Code Table
7
Disassembly
8
F Panel Section
9
Board
9
Cabinet (R) Section
10
Side Cabinet (25) Assembly
11
P Cabinet (C)(25M) Assembly
12
Lcd Unit
13
Board
13
Liquid Crystal Indicator Module
14
Lcd Hinge Assembly
14
Board
15
LOUD SPEAKER (1.6 CM)
16
Tripod (Large)
16
Cabinet (R) (25) Assembly
17
Battery Panel Section
17
Evf Section
18
Lens Section
22
Lens Device (Lsv-650E)
23
Board
24
VC-307 Board
24
Block Assembly
26
MD-097 Block Assembly
26
Fp-609 Flexible Board
28
Circuite Boards Location
29
Control Switch Block (Ps-Cx5500)
30
Flexible Boards Location
30
HELP (List of Caution Points Is Shown Here.)
32
Block Diagrams
33
Overall Block Diagram (1/4)
33
Overall Block Diagram (2/4)
33
Overall Block Diagram (3/4)
33
Overall Block Diagram (4/4)
33
Power Block Diagram (1/3)
33
Power Block Diagram (2/3)
33
Power Block Diagram (3/3)
33
Printed Wiring Boards and Schematic Diagrams
41
Frame Schematic Diagram (1/3)
42
Frame Schematic Diagram (2/3)
43
Frame Schematic Diagram (3/3)
43
Schematic Diagrams
44
Evf Connector, Evf Back Light)
44
Flexible
44
Pitch/Yaw Sensor,Remote Sensor,MIC
50
Connector,Function Switch
51
Function Switch
52
Kp-Cx5500/Ps-Cx5500
53
Board Are Not Shown
54
Pages from 4-27 to 4-78 Are Not Shown
54
Audio/Video Jack) Flexible
55
Printed Wiring Boards
56
Printed Wiring Board
57
Printed Wiring Board
58
Printed Wiring Board
62
MIC
63
Pages from 4-95 to 4-104 Are Not Shown
63
Printed Wiring Board
63
Printed Wiring Board of the MD-097, SS-174T and
63
Waveforms
64
Not Shown
64
Pages from 4-106 to 4-107 Are Not Shown
64
Waveforms of the VC-307 Board Is
64
Mounted Parts Location
65
Repair Parts List
67
Exploded Views
67
Overall Section
67
F Panel and Battery Panel Section
70
Lens Section
71
Evf Section
72
MD Section
73
Cabinet (L) Section
74
Cabinet (R) Section
75
Lcd Section
76
Electrical Parts List
77
Revision History
84
Dcr-Dvd100/Dvd100E
90
Adjustment
91
Before Starting Adjustment
91
Adjusting Items When Replacing Main Parts and Boards
92
Camera Section Adjustment
94
List of Service Tools
94
Preparations before Adjustment
94
Preparations
95
Order of Adjustments
97
Precaution
97
Setting the Switch
97
Subjects
97
Initialization of A, B, C, D, E, F, 1F Page Data
98
Camera System Adjustments
104
HALL Adjustment
104
Mhz Origin Oscillation Adjustment (VC-307 Board)
104
Flange Back Adjustment (Using Minipattern Box)
105
Flange Back Adjustment (1)
106
Flange Back Adjustment (2)
106
Flange Back Adjustment (Using Flange Back Adjustment 8. Chart and Subject more than 500M Away)
106
Flange Back Check
107
Optical Axis Adjustment
108
Mechanical Shutter Adjustment
109
Picture Frame Setting
110
Color Reproduction Adjustment
111
LV Standard Data Input
112
MAX GAIN Adjustment
112
Auto White Balance Standard Data Input
113
Picture Frame Setting (All White Frame)
113
Auto White Balance Adjustment
114
White Balance Check
115
Steady Shot Check
116
Adjustment
117
Color Electronic Viewfinder System
117
VCO Adjustment (VC-307 Board)
118
Contrast Adjustment (VC-307 Board)
119
RGB AMP Adjustment (VC-307 Board)
119
White Balance Adjustment (VC-307 Board)
120
Lcd System Adjustment
121
VCO Adjustment (PD-188 Board)
121
Black Limit Adjustment (PD-188 Board)
122
Bright Adjustment (PD-188 Board)
122
Contrast Adjustment (PD-188 Board)
123
PSIG GLAY Adjustment (PD-188 Board)
123
Center Level Adjustment (PD-188 Board)
124
COM Adjustment (PD-188 Board)
124
White Balance Adjustment (PD-188 Board)
125
Equipment to Required
126
Preparations before Adjustments
126
Video Section Adjustment
126
Precautions on Adjusting
127
Adjusting Connectors
128
Connecting the Equipment
128
Input/Output Level and Impedance
129
S VIDEO out Chroma Level Adjustment
130
S VIDEO out y Level Adjustment (VC-307 Board)
130
Video System Adjustments
130
VIDEO out Y, Chroma Level Check (VC-307 Board)
131
Overall Distortion Check
132
Overall Level Characteristics Check
132
Overall Noise Level Check
132
Adjustment Remote Commander
133
Precautions Upon Using the Adjustment
133
Remote Commander
135
Service Mode
133
Using the Adjustment Remote Commander
133
Bit Value Discrimination
135
Service Mode
135
Setting the Test Mode
135
Switch Check (1)
136
Switch Check (2)
136
Switch Check (3)
136
Record of Use Check
137
Record of Self-Diagnosis Check
138
Switch Check (4)
137
Dsc-P100/P120
144
Adjustments
145
Before Starting Adjustment
145
Main Parts and Boards
146
Camera Section Adjustments
147
List of Service Tools
147
Preparations before Adjustments
147
Preparations
148
Precautions
149
Setting the Switch
149
Subjects
149
Preparing the Flash Adjustment Box
150
Connection
151
Operation
151
Precaution on Use of SEUS
151
Using Method of SEUS
151
Adjustment Programs
152
Automatic Adjustment Program
152
Function of each Button on Main Menu Screen
152
Precautions When Using Automatic Adjustment
152
Program
152
Start of Automatic Adjustment Program
152
Application Environment
153
Color Shading Adjustment Program
153
Installation Method
153
Notes When Using the Color Shading Adjustment
153
Program
153
Screen and Function of each Button of Color Shading Adjustment Program
153
Starting Method of Color Shading Adjustment
153
Adjustment Items of Video System Adjustment
154
Function of each Button on Video System
154
Adjustment Screen
154
Video System Adjustments
154
Adjusting Method
155
Camera System Adjustments
156
Function of each Button on Camera System
156
Adjustment Screen
156
Camera Adjustment 1
157
Camera Adjustment 2
157
Picture Frame Setting (Standard Picture Frame)
160
Color Shading Adjustment
161
Camera Adjustment 3
162
Camera Adjustment 4
164
Adjustment Items of LCD System Adjustment
165
Function of each Button on LCD System
165
Adjustment Screen
165
LCD System Adjustments
165
Adjusting Method
166
1-6-1.Error Message
167
Adjustment NG
167
Adjustment Time out
167
Connect Error
167
Error
167
Reset the Camera and Try Again
167
Data Save Error
168
Precautions When an Error Occurred
168
Initialization of Data
169
Bit Value Discrimination
170
Service Mode
170
Setting the Test Mode
170
LED Check
171
Switch Check (1)
171
Mode Dial Check
172
Self Diagnosis Code
172
Switch Check (2)
172
Advertisement
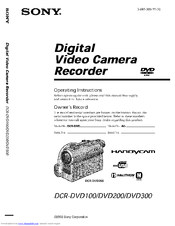
Sony Handycam DCR-DVD100 Operating Instructions Manual (148 pages)
Digital Video Camera Recorder
Brand:
Sony
| Category:
Camcorder
| Size: 2.9 MB
Table of Contents
Digital Video Camera
1
Operating Instructions
1
Declaration of Conformity
2
Read this First
4
What You Can Do with Your DVD Handycam
4
What Is the Difference between DVD-R and DVD-RW
6
How to Prepare and Use Your DVD Handycam
8
Table of Contents
10
Getting Started
12
Using this Manual
12
Checking the Supplied Accessories
14
Step 1 Preparing the Power Source
15
Installing/Removing the Battery Pack
15
Charging the Installed Battery Pack
16
Playing Time
17
Showing the Remaining Battery Time - BATTERY INFO
18
Connecting to a Wall Outlet
18
Step 2 Opening the LCD Screen
19
Step 3 Turning on the Power
20
Step 4 Setting the Date and Time
21
Simple Setting of the Clock Using a Time Difference
23
Step 5 Adjusting the LCD Screen and the Viewfinder
24
Adjusting the Brightness of the LCD Screen
24
Adjusting the Viewfinder
25
Step 6 Preparing a Disc for Recording
26
Shooting Movies/Still Images
28
Before Shooting
28
Shooting Movies
29
Shooting Still Images
34
Shooting Techniques to Match Your Circumstances
41
Shooting Backlit Subjects - BACK LIGHT
41
Shooting in the Dark - Nightshot/Super Nightshot/Color Slow Shutter
41
Shooting with the Subject Checking the Image - Mirror Mode
43
Self-Timer Recording
43
Adjusting the White Balance Manually
44
Shooting for the Wide-Screen TV - Wide Mode
45
To Cancel the Wide Mode
46
Optimizing the Camera Automatically - PROGRAM AE
47
Adjusting the Exposure Manually
48
Focusing Manually
49
Shooting with Special Effects
50
Using Fader (for Movies Only)
50
Using Special Effects - Picture Effect/Digital Effect
51
Other Functions
53
Checking the Last Scene - Review
53
Deleting the Last Scene (DVD-Rws Only)
53
Changing the Disc Title
54
Viewing the Recordings
55
Playing a Disc on Your Camcorder
55
Choosing and Viewing a Recording - Visual Index
55
To Stop Playback
56
Various Playback Modes
57
To Display the Indicators During Playback - Display
58
Magnifying Recorded Images - PB ZOOM
60
Playing Still Images Automatically - Slide Show
61
Viewing Recordings on TV
62
If Your TV Is Already Connected to a VCR
62
If Your TV or VCR Is a Monaural Type
62
Finalizing a Disc for Other Players
63
Finalizing a Disc
63
Playing Back a Finalized Disc on Other Players
66
Playing Back a Disc on DVD Players
66
Playing Back Movies on a Computer with a DVD Drive Installed
68
Showing Still Images on a Computer with a DVD Drive Installed
68
Structures and File Names of Movies and Still Images
69
Recording on a Finalized Disc - Unfinalizing (VIDEO Mode DVD-Rws Only)
70
Recording Again on a Used Disc - Formatting (DVD-Rws Only)
72
Table of Contents
74
Using a Disc in VR Mode (DVD-Rws Only)
74
Selecting the Playing Order on Your Camcorder - Playlist
74
Registering Movies or Still Images to the Playlist
74
Saving All the Still Images on a Disc to a Movie File
77
Erasing Unnecessary Scenes from the Playlist
78
Changing the Order Within the Playlist
80
Dividing a Movie Within the Playlist
82
Playing the Playlist
84
Editing the Original Data
85
Dividing a Movie
85
Deleting Movies/Still Images
87
Viewing/Dubbing Discs/ Editing the Recordings on Your Computer
89
Connecting Your Camcorder to Your Computer - Introduction
89
System Requirements
89
Installing the USB Driver
90
Installing Software
91
Connecting Your Camcorder to the Computer
92
Consulting the On-Line Help
97
(Operating Instructions) of Imagemixer Ver.1.5 for Sony DVD Handycam
97
Viewing Scenes Recorded on Your Computer
98
Viewing Scenes on the Disc
98
Making a Disc Copy - Disc Dubbing
100
Making a Disc Copy
100
Editing and Saving Scenes
101
Editing Movies
101
Saving the Movie on Your Computer
101
Creating an Original Disc
102
Making a Menu
102
Editing the Contents
103
Recording on a Disc
104
Connecting Your Camcorder to a TV and a VCR
105
Dubbing a Disc to a Tape
105
Connecting Your Camcorder to a VCR
105
Dubbing to a Tape
106
Dubbing a TV Program or Video Tape Onto a Disc
107
Connecting Your Camcorder to a TV or a VCR
107
Dubbing Onto a Disc
107
Customizing Your Camcorder
108
Changing the SETUP Display
108
Selecting the Option of each Item
109
Troubleshooting
116
Types of Trouble and Corrective Action
116
During Playback
117
Self-Diagnosis Display
123
Warning Indicators
124
Warning Messages
125
Additional Information
127
About the "Infolithium" Battery Pack
127
Glossary
128
Using Your Camcorder Abroad
129
Maintenance Information and Precautions
130
Care and Storage of the Lens
131
Specifications
134
Parts and Controls/Index
136
Identifying Parts and Controls
136
Operation Indicators
143
Index
144
Sony Handycam DCR-DVD100 Operating Instructions Manual (146 pages)
Digital Video Camera Recorder
Brand:
Sony
| Category:
Camcorder
| Size: 13.84 MB
Table of Contents
Read this First
4
DVD Handycam
4
Handycam
5
Table of Contents
10
Getting Started
12
Using this Manual
12
Step 1 Preparing the Power Source
17
Step 2 Opening the LCD Screen
19
Step 3 Turning on the Power
20
Step 4 Setting the Date and Time
23
Step 5 Adjusting the LCD Screen and the Viewfinder
24
Step 5 Adjusting the LCD Screen and the Viewfinder
25
Step 6 Preparing a Disc for Recording
27
Shooting Movies/Still
28
Shooting Movies
28
The Image
29
The Battery
31
Battery Time
31
Back Light
41
Nightshot
41
Wide Mode
46
Program Ae
47
Adjusting the Exposure Manually
48
Shooting with Special Effects
50
Using Special Effects Picture Effect/Digital Effect
51
Other Functions
53
Playing a Disc on Your" Camcorder
55
Visual Index
55
Pb Zoom
60
A Disc for Other
66
Playing Back a Finalized Disc on Other
69
Recording on a Finalized Disc
70
Unfinalizing
70
Recording Again on a Used Disc
72
(DVD-Rws Only)
72
(DVD-Rws Only)
73
Selecting the Playing Order
74
Camcorder Playlist
74
To the Playlist
76
Erasing Unnecessary
78
The Playlist
78
Playlist
78
Playlist
79
Editing the Original
85
Data
85
Images
88
Scenes
89
Computer
98
Computer
99
Computer
100
Computer
101
Editing and Saving Scenes
101
Computer
103
Disc
103
Computer
104
A Disc to a Tape
105
Vcr
105
To a Tape
106
Your Camcorder
106
The SETUP Display
108
Item
108
Computer
117
Display
123
Indicators
124
Messages
125
About the "Infolithium" Battery
127
Pack
127
Glossary
128
Shooting Still Images
128
Information and Precautions
130
Your Camcorder to
104
Parts and Controls/Index
136
Parts and Controls
136
Index
144
Advertisement
Sony Handycam DCR-DVD100 Operating Instructions Manual (191 pages)
Digital Video Camera Recorder
Brand:
Sony
| Category:
Camcorder
| Size: 30.06 MB
Sony Handycam DCR-DVD100 Technology Handbook (24 pages)
DVD Handycam
Brand:
Sony
| Category:
Camcorder
| Size: 1.57 MB
Table of Contents
Camcorders: an Introduction
3
Table of Contents
4
DVD: a Brief History
5
DVD Media Technology
6
DVD Video Recording Applications
10
The DVD Handycam Concept
12
DVD Handycam Record Modes and Media
14
DVD Handycam Still-Image Recording
15
DVD Handycam Editing
16
Faq (Frequently Asked Questions)
18
Glossary
20
Advertisement
Related Products
Sony Handycam DCR-DVD100E
Sony DCR-DVD101
Sony Handycam DCR-DVD101E
Sony DCR-DVD105 Nero Express 6
Sony Handycam DCR-DVD105E
Sony Handycam DCR-DVD108E
Sony Handycam DCR-DVD106E
Sony Handycam DCR-DVD108
Sony Handycam DCR-DVD109
Sony DCR DVD105 - Handycam Camcorder - 680 KP
Sony Categories
Laptop
TV
CD Player
Camcorder
Digital Camera
More Sony Manuals
Login
Sign In
OR
Sign in with Facebook
Sign in with Google
Upload manual
Upload from disk
Upload from URL