Sign In
Upload
Manuals
Brands
Radio Shack Manuals
Scanner
20-496
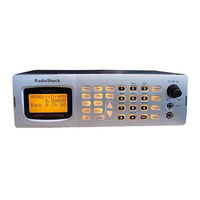
Radio Shack 20-496 Trunking Scanner Manuals
Manuals and User Guides for Radio Shack 20-496 Trunking Scanner. We have
1
Radio Shack 20-496 Trunking Scanner manual available for free PDF download: User Manual
Radio Shack 20-496 User Manual (84 pages)
Digital Trunking Mobile/Base Scanner
Brand:
Radio Shack
| Category:
Scanner
| Size: 1.73 MB
Table of Contents
Table of Contents
3
Your Scanner's Keypad
7
The Basics
8
Your Scanner's Rear View
9
Your Scanner's Display
10
Step 1: Install Your Scanner
11
Mounting Your Scanner in Your Dashboard
11
Mobile Mounting in Your Vehicle
11
Using Your Scanner as a Base Station
12
Step 2: Power Your Scanner
13
From a Wall Outlet
13
Through Your Vehicle's Ignition
13
From Your Vehicle's Cigarrette Lighter
14
Step 3: Connect Your Scanner
15
Connect the Supplied Antenna
15
Connect an External Antenna
15
Connect an External Speaker or Headphones
16
Step 4: Set up Your Scanner
17
Step 4: Set up Your Scanner Squelch
17
Squelch
17
Storing Conventional Frequencies
17
Deleting Frequencies from Channels
18
Searching and Tuning
19
Basic Scanning
20
About Channel-Storage Banks
20
Monitoring a Single Channel
20
Using CTCSS and DCS
21
Searching a Preprogrammed Frequency Range
21
Search Bank Charts
22
Beyond the Basics
23
Searching for Active Frequencies
27
Using Zeromatic
27
Using Seek Search
27
Manually Tuning to a Frequency
28
Frequency Copy
29
Copying a Frequency into a Specifi Ed Channel
29
Copying a Frequency to a Vacant Channel into a Specifi Ed Bank
30
Copying a Frequency to the Priority Channel
30
Listening to the Weather Band
31
Same Standby Mode
31
Testing Weather Alert
32
Using Delay
33
Locking out Channels/Frequencies
33
Locking out Channels
33
Locking out Frequencies
34
Reviewing Locked-Out Search Frequency
34
Clearing Locked-Out Search Frequencies
35
Clearing Locked-Out Frequencies in Search Banks
35
Changing the Receive Mode
35
Using Attenuator
36
Global Attenuator
37
Turning the Key Tone on or off
37
Using the Dimmer
38
Changing the Display Contrast
38
Virtual Scanner
39
Using V-Scanner
40
Using Digital AGC
45
Cloning Programmed Data
45
Cloning V-Scanner Data
46
Full Cloning
47
Selective Cloning
47
Trunking Operation
50
Setting Squelch for Trunk Scanning
50
Talkgroup ID Hold
50
Turning an ID Sub-Bank on or off
50
Open and Closed Mode Operation
51
Toggling Open and Closed Modes
52
Manual ID Lockout Toggle
52
Activate ID Lockout While Scanning
53
Reviewing Locked-Out Talkgroup Ids
53
Changing from ID Text Tag Display to ID Code Display
53
Trunked Delay Function
53
Clearing Talkgroups Ids
54
Clearing All Talkgroup Ids in One Bank
55
Programming Trunked Systems
56
Motorola Analog, Digital, and APCO-25 Systems
56
EDACS Systems
57
Motorola VHF and UHF Systems
58
Motorola 800Mhz Splinter Systems
59
Fl Eet Maps
59
Programming the Priority Channel
61
Programming a Stored Channel Frequency in the Priority Channel
61
Programming the Priority Channel Directly
61
Programming a Weather Channel as the Priority Channel
62
Turning Priority on or off
62
Programming CTCSS/DCS Channels
63
Storing Talkgroup Ids
65
Text Tags
67
Assigning a Text Tag to a Channel
67
Assigning a Text Tag to a Group ID
68
Assigning a Text Tag to a Channel-Storage Bank
68
Text Input Chart
69
Using Channel Receive Modes
69
Updating the DSP Fi Rmware
69
Troubleshooting
70
Truobleshooting
70
Resetting/Initializing Your Scanner
71
Resetting Your Scanner
71
Initializing Your Scanner
72
Care
73
Replacing the Fuse
73
Service and Repair
73
Specifi Cations
74
The FCC Wants You to Know
77
Scanning Legally
77
Glossary
78
Warranty
84
©2004. Radioshack Corporation
84
All Rights Reserved
84
Advertisement
Advertisement
Related Products
Radio Shack 20-423
Radio Shack 20-405
Radio Shack 20-427 PRO-2054
Radio Shack 20-417
Radio Shack 20-466
Radio Shack 20-426
Radio Shack 20-430
Radio Shack 20-461
Radio Shack 20-422
Radio Shack 20-419
Radio Shack Categories
Cordless Telephone
Scanner
Telephone
Radio
Desktop
More Radio Shack Manuals
Login
Sign In
OR
Sign in with Facebook
Sign in with Google
Upload manual
Upload from disk
Upload from URL