Sign In
Upload
Manuals
Brands
Philips Manuals
DVD Recorder
DVDR3365
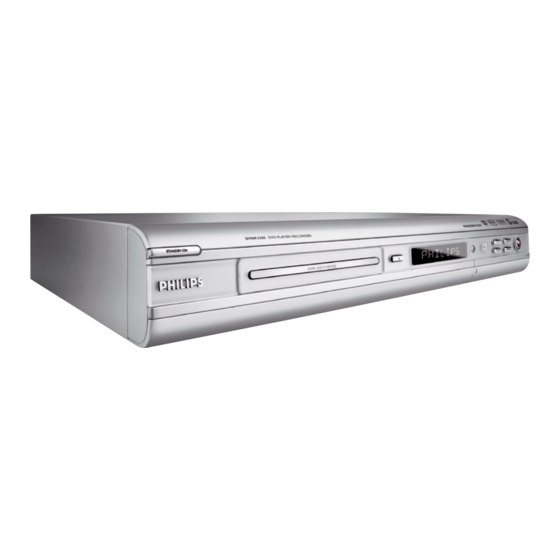
Philips DVDR3365 Manuals
Manuals and User Guides for Philips DVDR3365. We have
7
Philips DVDR3365 manuals available for free PDF download: User Manual, Service Manual, Quick Use Manual, Specifications
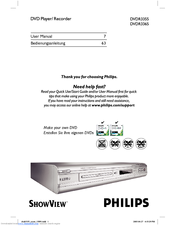
Philips DVDR3365 User Manual (84 pages)
Digital A/V Surround Receiver, DVD Player/ Recorder
Brand:
Philips
| Category:
Receiver
| Size: 5.48 MB
Table of Contents
Table of Contents
4
General Information
5
Supplied Accessories
5
Care and Safety Information
5
Connections
6
Step 1: Set up the Speakers
6
Step 2: Placing the Speakers and Subwoofer
6
Step 3: Connecting Speakers and Subwoofer
7
Step 4: Connecting FM/MW Antennas
8
Step 5: Connecting the Power Cord
8
Optional Connections - Playback
9
Connecting to Tv/Vcr/Other Audio Devices
9
Connecting to a DVD/SACD Player
10
Option 1: Using 6 Channel in Jacks
10
Option 2: Using Coaxial in Jack
10
Option 3: Using Optical in Jack
10
Optional Connections - Recording
11
Connecting to a Recording Device
11
Functional Overview
12
Main Unit and Remote Control
12
Control Buttons Available on the Remote Only
13
Getting Started
14
Step 1: Inserting Batteries into the Remote Control
14
Using the Remote Control to Operate the System
14
Step 2: Switching On/Off
14
Switching to an Active Mode
14
Switching to Standby Mode
14
Step 3: Setting the Speakers
14
Adjusting the Speaker Output Levels
15
Sound Controls
16
Selecting Surround Sound
16
Selecting Digital Sound Effects
16
Adjusting the Bass/Treble Level
16
Volume Controls and Other Features
17
Volume Control
17
Night Mode - Turning On/Off
17
Dimming System's Display Screen
17
Setting the Sleep Timer
17
Tuner Operations
18
Tuning to Radio Stations
18
Presetting Radio Stations
18
Automatic Presetting
18
Manual Presetting
18
Selecting a Preset Radio Station
19
Troubleshooting
20
Specifications
21
Glossary
22
Disposal of Your Old Product
27
Frequently Asked Questions
29
Table of Contents
30
Care and Safety Information
32
Setup
32
Cleaning Discs
32
About Recycling
32
General Information
33
Introduction
33
Accessories Supplied
33
Region Codes
33
Basic Connections - DVD Recorder
34
Step 1: Connecting the Antenna Cables
34
Step 2: Connecting the Video Cable
35
Option 1: Using Scart Socket (Best Picture Quality)
35
Option 2: Using S-Video Socket (Excellent Picture Quality)
35
Option 3: Using Video (CVBS) Socket (Good Picture Quality)
35
Step 3: Connecting the Audio Cables
36
Option 1: Using Audio Sockets
36
Option 2: Using Coaxial Socket
36
Optional Connections
37
Connecting to a Cable Box or Satellite Receiver
37
Connecting to a VCR or Other Similar Device
38
Connecting to a VCR and Cable Box/Satellite Receiver
39
Connecting a Camcorder to the Front Sockets
40
Option 1: Using DV in Socket
40
Option 2: Using S-VIDEO in or VIDEO in Socket
40
Connecting a USB Flash Drive or USB Memory Card Reader
41
Remote Control (DVDR3365)
42
Remote Control (DVDR3355)
43
Main Unit
46
Sockets Behind the Flap
46
Getting Started
47
Step 1: Inserting Batteries
47
Using the Remote Control to Operate the System
47
Step 2: Setting the TV
47
Step 3: Select the Country of Your Residence
48
Step 4: TV Channel Programming
48
Automatic TV Channel Search
48
Modifying Channel Information
49
Sorting the TV Channels
50
Step 5: Setting the Language
50
Step 6: Setting the Time & Date
51
Recording
52
Discs for Recording
52
Recording Settings
52
Auto Chapter Markers
53
Default Source
53
Default Recording Mode
53
Manual Recording
54
One Touch Recording - Automatic Turn-Off
54
About Timer Recording
55
Timer Recording (Manually)
55
Setting a Timer Recording from an External Cable Box/Satellite Receiver
56
Timer Recording (SHOW VIEW ® System)
57
Changing/ Deleting a Timer Recording
58
Simultaneous Recording and Playback
58
Editing/Finalising Recording
59
About Disc Editing
59
Accessing Disc Editing Menu
59
Rename Disc
60
Erase Disc (DVD+RW Only)
60
Record New Title
60
Overwrite Disc (DVD+RW Only)
60
Make Compatible (DVD+RW Only)
61
Lock/Unlock Disc (DVD+RW Only)
61
Playing Your Recordings (DVD+R) on Other DVD Players
61
About Title Editing
62
Accessing Title Editing Menu
62
Video Editing
62
Rename Title
62
Erase Title
62
Overwrite Title (DVD+RW Only)
62
Overwrite from the Selected Title
63
Append Recording
63
About Video Editing
64
Accessing Video Editing Menu
64
Selecting a Title
65
Selecting a Chapter
65
Creating Chapter Marker
65
Hiding an Unwanted Chapter
66
Changing Index Picture
66
Splitting a Title (DVD+RW Only)
66
Playback
67
Playable Discs
67
Inserting a Disc
67
Starting Disc Playback
68
Playing a DVD Video Disc
68
Playing a (Super) Video CD
68
Playing an Audio CD
68
Playing a DVD+R/+RW Disc
69
Playing a DIVX Disc
69
Playing an MP3 Disc
69
Playing a Picture Disc (or Musical Slide Show)
70
Playing from a USB Flash Drive /USB Memory Card Reader
70
Advance Playback Features
71
Changing to Another Title/Chapter
71
Track
71
Pausing Playback and Step Play
71
Searching Forwards/Backwards
71
Using T/C Options
72
Selecting Various Repeat/Shuffle Functions
72
Programming Disc Tracks
73
Changing the Audio Soundtrack Language
73
Changing Subtitle Language
74
Switching Camera Angles
74
Time Search
74
DVD System Menu Options
75
Accessing System Menu - General
75
Screen Saver
75
Country
75
Video Output Format
76
Restore Factory Settings
76
Accessing System Menu -Playback
77
TV Aspect Ratio
77
Parental Rating Level
78
Rating Explanations
78
Setting or Changing the Password
79
Digital Audio Output
79
Accessing System Menu - Record
80
Accessing System Menu - Language
80
Accessing System Menu - Channel
80
Setup
80
Accessing System Menu - Clock
80
Date and Time
80
Show DIVX ® Registration Code
80
Specifications
81
Troubleshooting
82
Glossary
84
Advertisement
PHILIPS DVDR3365 User Manual (64 pages)
DVD player/recorder
Brand:
PHILIPS
| Category:
DVD Player
| Size: 2.3 MB
Table of Contents
User Manual
1
Index
3
Special Features
4
Frequently Asked Questions
5
Table of Contents
6
Care and Safety Information
8
Setup Precautions
8
Cleaning Discs
8
About Recycling
8
General Information
9
Introduction
9
Accessories Supplied
9
Region Codes
9
Copyright Notice
9
Step 1: Connecting the Antenna Cables
10
Basic Connections - DVD Recorder
11
Step 2: Connecting the Video Cable
11
Option 1: Using a Video (CVBS) Cable
11
Option 2: Using an S-Video Cable
11
Option 3: Using a Component Video Cable
11
Step 3: Connecting the Audio Cables
12
Option 1: Using an Audio Cable
12
Option 2: Using a Coaxial Cable
12
Optional Connections
13
Connecting to a Cable Box or Satellite Receiver
13
Connecting to a VCR or Other Similar Device
14
Connecting to a VCR and Cable Box/Satellite Receiver
15
Connecting a Camcorder to the Front Jacks
16
Option 1: Using DV in Jack
16
Option 2: Using S-VIDEO in or VIDEO in Jack
16
Connecting a USB Fl Ash Drive or USB Memory Card Reader
17
Remote Control
18
Main Unit
20
Jacks Behind the Fl Ap
20
Getting Started
21
Step 1 : Inserting Batteries
21
Using the Remote Control to Operate the System
21
Step 2 : Finding the Viewing Channel
21
Step 3 : TV Channel Programming
22
Automatic TV Channel Search
22
Modifying Channel Information
23
Sorting the TV Channels
24
Step 4 : Setting the Language
24
Step 5 : Setting the Time & Date
25
Recording
26
Discs for Recording
26
Recording Settings
26
Auto Chapter Markers
27
Default Source
27
Default Recording Mode
27
Manual Recording
28
One Touch Recording - Automatic Turn-Off
28
About Timer Recording
29
Timer Recording (Manually)
29
Setting a Timer Recording from an External Cable Box/ Satellite Receiver
30
Timer Recording (G- CODE ® System)
31
Changing/ Deleting a Timer Recording
32
Watching Another TV Channel During Recording
32
Editing/Finalizing Recording
33
About Disc Editing
33
Accessing Disc Editing Menu
33
Rename Disc
34
Erase Disc (DVD±RW Only)
34
Record New Title
34
Overwrite Disc (DVD±RW Only)
34
Make Compatible (DVD±RW Only)
35
Lock/Unlock Disc (DVD±RW Only)
35
Playing Your Recordings (DVD±R) on Other DVD Players
35
About Title Editing
36
Accessing Title Editing Menu
36
Editing Video
36
Rename Title
37
Erase Title
37
Overwrite Title (DVD±RW Only)
37
Overwrite from the Selected Title
37
Append Recording
37
About Video Editing
38
Accessing Video Editing Menu
38
Selecting a Title
39
Selecting a Chapter
39
Creating Chapter Marker
39
Hiding an Unwanted Chapter
40
Changing Index Picture
40
Splitting a Title (DVD±RW Only)
40
Playback
41
Playable Discs
41
Inserting a Disc
41
Starting Disc Playback
42
Playing a DVD Video Disc
42
Playing a (Super) Video CD
42
Playing an Audio CD
42
Playing a DVD±R/±RW Disc
42
Playing a DIVX Disc
43
Playing an MP3 Disc
43
Playing a Picture Disc (or Musical Slide Show)
43
Playing from a USB Fl Ash Drive /USB Memory Card Reader
44
Additional Playback Features
45
Changing to Another Title/Chapter/ Track
45
Pausing Playback and Step Play
45
Searching Forward/Backward
45
Zooming in
45
Using T/C Options
46
Selecting Various Repeat/Shuffl E Functions
46
Programming Disc Tracks
47
Changing the Audio Soundtrack Language
47
Changing Subtitle Language
48
Switching Camera Angles
48
Time Search
48
DVD System Menu Options
49
Accessing System Menu - General
49
Screen Saver
49
Progressive/ Interlace
50
Video Output Format
50
Restore Factory Settings
50
Accessing System Menu -Playback
51
TV Aspect Ratio
51
Parental Rating Level
52
Setting or Changing the Password
53
Digital Audio Output
53
Accessing System Menu - Record
54
Accessing System Menu - Language
54
Accessing System Menu - Channel
54
Setup
54
Accessing System Menu - Clock
54
Date and Time
54
Show DIVX® Registration Code
54
Specifi Cations
55
Troubleshooting
56
Troubleshooting
57
Glossary
58
Tv System Guide
60
Philips DVDR3365 User Manual (62 pages)
DVD Player/ Recorder
Brand:
Philips
| Category:
DVD Player
| Size: 11.46 MB
Table of Contents
Disposal of Your Old Product
5
Frequently Asked Questions
7
Table of Contents
8
Care and Safety Information
10
Setup
10
Cleaning Discs
10
About Recycling
10
General Information
11
Introduction
11
Accessories Supplied
11
Region Codes
11
Basic Connections - DVD Recorder
12
Step 1: Connecting the Antenna Cables
12
Step 2: Connecting the Video Cable
13
Option 1: Using Scart Socket (Best Picture Quality)
13
Option 2: Using S-Video Socket (Excellent Picture Quality)
13
Option 3: Using Video (CVBS) Socket (Good Picture Quality)
13
Step 3: Connecting the Audio Cables
14
Option 1: Using Audio Sockets
14
Option 2: Using Coaxial Socket
14
Optional Connections
15
Connecting to a Cable Box or Satellite Receiver
15
Connecting to a VCR or Other Similar Device
16
Connecting to a VCR and Cable Box/Satellite Receiver
17
Connecting a Camcorder to the Front Sockets
18
Option 1: Using DV in Socket
18
Option 2: Using S-VIDEO in or
18
VIDEO in Socket
18
Connecting a USB Flash Drive or USB Memory Card Reader
19
Remote Control (DVDR3365)
20
Remote Control (DVDR3355)
21
Main Unit
24
Sockets Behind the Flap
24
Getting Started
25
Step 1: Inserting Batteries
25
Using the Remote Control to Operate the System
25
Step 2: Setting the TV
25
Step 3: Select the Country of Your Residence
26
Step 4: TV Channel Programming
26
Automatic TV Channel Search
26
Modifying Channel Information
27
Sorting the TV Channels
28
Step 5: Setting the Language
28
Step 6: Setting the Time & Date
29
Recording
30
Discs for Recording
30
Recording Settings
30
Auto Chapter Markers
31
Default Source
31
Default Recording Mode
31
Manual Recording
32
One Touch Recording - Automatic Turn-Off
32
About Timer Recording
33
Timer Recording (Manually)
33
Setting a Timer Recording from an External Cable Box/Satellite Receiver
34
Timer Recording (SHOW VIEW ® System)
35
Changing/ Deleting a Timer Recording
36
Simultaneous Recording and Playback
36
Editing/Finalising Recording
37
About Disc Editing
37
Accessing Disc Editing Menu
37
Rename Disc
38
Erase Disc (DVD+RW Only)
38
Record New Title
38
Overwrite Disc (DVD+RW Only)
38
Make Compatible (DVD+RW Only)
39
Lock/Unlock Disc (DVD+RW Only)
39
Playing Your Recordings (DVD+R) on Other DVD Players
39
About Title Editing
40
Accessing Title Editing Menu
40
Video Editing
40
Rename Title
41
Erase Title
41
Overwrite Title (DVD+RW Only)
41
Overwrite from the Selected Title
41
Append Recording
41
About Video Editing
42
Accessing Video Editing Menu
42
Selecting a Title
43
Selecting a Chapter
43
Creating Chapter Marker
43
Hiding an Unwanted Chapter
44
Changing Index Picture
44
Splitting a Title (DVD+RW Only)
44
Playback
45
Playable Discs
45
Inserting a Disc
45
Starting Disc Playback
46
Playing a DVD Video Disc
46
Playing a (Super) Video CD
46
Playing an Audio CD
46
Playing a DVD+R/+RW Disc
47
Playing a DIVX Disc
47
Playing an MP3 Disc
47
Playing a Picture Disc (or Musical Slide Show)
48
Playing from a USB Flash Drive /USB Memory Card Reader
48
Advance Playback Features
49
Changing to Another Title/Chapter
49
Track
49
Pausing Playback and Step Play
49
Searching Forwards/Backwards
49
Using T/C Options
50
Selecting Various Repeat/Shuffle Functions
50
Programming Disc Tracks
51
Changing the Audio Soundtrack Language
51
Changing Subtitle Language
52
Switching Camera Angles
52
Time Search
52
DVD System Menu Options
53
Accessing System Menu - General
53
Screen Saver
53
Country
53
Video Output Format
54
Restore Factory Settings
54
Accessing System Menu -Playback
55
TV Aspect Ratio
55
Parental Rating Level
56
Setting or Changing the Password
57
Digital Audio Output
57
Accessing System Menu - Record
58
Accessing System Menu - Language
58
Accessing System Menu - Channel
58
Setup
58
Accessing System Menu - Clock
58
Date and Time
58
Show DIVX ® Registration Code
58
Specifications
59
Troubleshooting
60
Glossary
62
Advertisement
Philips DVDR3365 User Manual (62 pages)
DVD Player/Recorder
Brand:
Philips
| Category:
DVD Player
| Size: 4.37 MB
Table of Contents
Frequently Asked Questions
7
Table of Contents
8
Care and Safety Information
10
Setup
10
Cleaning Discs
10
About Recycling
10
General Information
11
Introduction
11
Accessories Supplied
11
Region Codes
11
Basic Connections - DVD Recorder
12
Step 1: Connecting the Antenna Cables
12
Step 2: Connecting the Video Cable
13
Option 1: Using Scart Socket (Best Picture Quality)
13
Option 2: Using S-Video Socket (Excellent Picture Quality)
13
Option 3: Using Video (CVBS) Socket (Good Picture Quality)
13
Step 3: Connecting the Audio Cables
14
Option 1: Using Audio Sockets
14
Option 2: Using Coaxial Socket
14
Optional Connections
15
Connecting to a Cable Box or Satellite Receiver
15
Connecting to a VCR or Other Similar Device
16
Connecting to a VCR and Cable Box/Satellite Receiver
17
Connecting a Camcorder to the Front Sockets
18
Option 1: Using DV in Socket
18
Option 2: Using S-VIDEO in or
18
VIDEO in Socket
18
Connecting a USB Flash Drive or USB Memory Card Reader
19
Remote Control (DVDR3365)
20
Remote Control (DVDR3355)
21
Main Unit
24
Sockets Behind the Flap
24
Getting Started
25
Step 1: Inserting Batteries
25
Using the Remote Control to Operate the System
25
Step 2: Setting the TV
25
Step 3: Select the Country of Your Residence
26
Step 4: TV Channel Programming
26
Automatic TV Channel Search
26
Modifying Channel Information
27
Sorting the TV Channels
28
Step 5: Setting the Language
28
Step 6: Setting the Time & Date
29
Recording
30
Discs for Recording
30
Recording Settings
30
Auto Chapter Markers
31
Default Source
31
Default Recording Mode
31
Manual Recording
32
One Touch Recording - Automatic Turn-Off
32
About Timer Recording
33
Timer Recording (Manually)
33
Setting a Timer Recording from an External Cable Box/Satellite Receiver
34
Timer Recording (SHOW VIEW ® System)
35
Changing/ Deleting a Timer Recording
36
Simultaneous Recording and Playback
36
Editing/Finalising Recording
37
About Disc Editing
37
Accessing Disc Editing Menu
37
Rename Disc
38
Erase Disc (DVD+RW Only)
38
Record New Title
38
Overwrite Disc (DVD+RW Only)
38
Make Compatible (DVD+RW Only)
39
Lock/Unlock Disc (DVD+RW Only)
39
Playing Your Recordings (DVD+R) on Other DVD Players
39
About Title Editing
40
Accessing Title Editing Menu
40
Video Editing
40
Rename Title
41
Erase Title
41
Overwrite Title (DVD+RW Only)
41
Overwrite from the Selected Title
41
Append Recording
41
About Video Editing
42
Accessing Video Editing Menu
42
Selecting a Title
43
Selecting a Chapter
43
Creating Chapter Marker
43
Hiding an Unwanted Chapter
44
Changing Index Picture
44
Splitting a Title (DVD+RW Only)
44
Playback
45
Playable Discs
45
Inserting a Disc
45
Starting Disc Playback
46
Playing a DVD Video Disc
46
Playing a (Super) Video CD
46
Playing an Audio CD
46
Playing a DVD+R/+RW Disc
47
Playing a DIVX Disc
47
Playing an MP3 Disc
47
Playing a Picture Disc (or Musical Slide Show)
48
Playing from a USB Flash Drive /USB Memory Card Reader
48
Advance Playback Features
49
Changing to Another Title/Chapter
49
Track
49
Pausing Playback and Step Play
49
Searching Forwards/Backwards
49
Using T/C Options
50
Selecting Various Repeat/Shuffle Functions
50
Programming Disc Tracks
51
Changing the Audio Soundtrack Language
51
Changing Subtitle Language
52
Switching Camera Angles
52
Time Search
52
DVD System Menu Options
53
Accessing System Menu - General
53
Screen Saver
53
Country
53
Video Output Format
54
Restore Factory Settings
54
Accessing System Menu -Playback
55
TV Aspect Ratio
55
Parental Rating Level
56
Setting or Changing the Password
57
Digital Audio Output
57
Accessing System Menu - Record
58
Accessing System Menu - Language
58
Accessing System Menu - Channel
58
Setup
58
Accessing System Menu - Clock
58
Date and Time
58
Show DIVX ® Registration Code
58
Specifications
59
Troubleshooting
60
Troubleshooting
61
Glossary
62
Philips DVDR3365 Service Manual (81 pages)
DVD-Video Recorder
Brand:
Philips
| Category:
DVD Recorder
| Size: 18.25 MB
Table of Contents
Table of Contents
1
1 Technical Specifi Cations and Connection Facilities
2
Digital Output
3
2 Safety Information, General Notes & Lead Free Requirements
4
3 Directions for Use
6
Start Playback
7
4 Mechanical Instructions
8
5 Upgrade Software & Repair Chart
11
6 Block Diagrams,Waveforms, Wiring Diagram
19
Overall Block Diagram
19
Control Block Diagram
20
Wiring Diagram
21
Waveforms of Analog Board
22
Waveforms of Digital Board
23
Test Point Overview for Analog Board
24
Test Point Overview for Digital Board
25
7 Circuit Diagram and PWB Layout
26
Analog: Frontend Video (FV)
26
Analog: Video in / out (IOV)
27
Analog: Audio in / out (IOA)
28
Analog: Power Supply (PS)
29
Analog: Multi Sound Processing (MSP)
30
Analog: Audio Converter (DAC_ADC)
31
Analog: Digital in / out 1 (DIGIO 1)
32
Analog: Control Unit (CU)
33
Layout: Analog-Main Part (Top View)
34
Layout: Analog-Main Part (Bottom View)
35
Front: Front Panel - Display
40
Front: Front Panel - Audio/Video in
41
Layout: Front Panel (Top Copper Pattern)
42
Layout: Front Panel (Bottom Copper Pattern)
42
Front: Standby
43
Layout: Standby (Top View)
43
Layout: Standby (Bottom View)
43
Digital: Back-End Processor
44
Digital: Memory
45
Digital: IEEE 1394 Physical Layer
46
Digital: Video Input Processor
47
Digital: Interfaces
48
Layout: Digital-Main Part (Top View)
49
Layout: Digital-Main Part (Bottom View)
50
8 Circuit- and IC Description
51
Front Board
51
Analog Board
51
Digital Board
56
IC Description
59
Analog Board
59
Digital Board
64
9 Exploded View & Spare Parts List
75
Exploded View of the Set
75
Spare Parts List
76
10 Revision List
81
Philips DVDR3365 Specifications (2 pages)
DVD Player/Recorder i.LINK
Brand:
Philips
| Category:
DVD Recorder
| Size: 0.28 MB
Table of Contents
Technical Specifications
2
Video Recording
2
Video Playback
2
Storage Media
2
Philips DVDR3365 Quick Use Manual (2 pages)
Brand:
Philips
| Category:
DVD Player
| Size: 1.04 MB
Advertisement
Related Products
Philips DVDR3360H
Philips DVDR3365/97
Philips DVDR3365/75
Philips DVDR3360H05
Philips DVDR3360H58
Philips DVDR3360H51
Philips DVDR3360H31
Philips DVDR3360H/97
Philips DVDR3305/05B
Philips DVDR3350H
Philips Categories
TV
Monitor
Stereo System
Electric Shaver
CD Player
More Philips Manuals
Login
Sign In
OR
Sign in with Facebook
Sign in with Google
Upload manual
Upload from disk
Upload from URL