Sign In
Upload
Manuals
Brands
JVC Manuals
Camcorder
Connected Cam GY-HC900CHE
JVC Connected Cam GY-HC900CHE Camcorders Manuals
Manuals and User Guides for JVC Connected Cam GY-HC900CHE Camcorders. We have
3
JVC Connected Cam GY-HC900CHE Camcorders manuals available for free PDF download: Instructions Manual
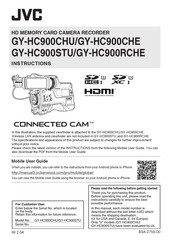
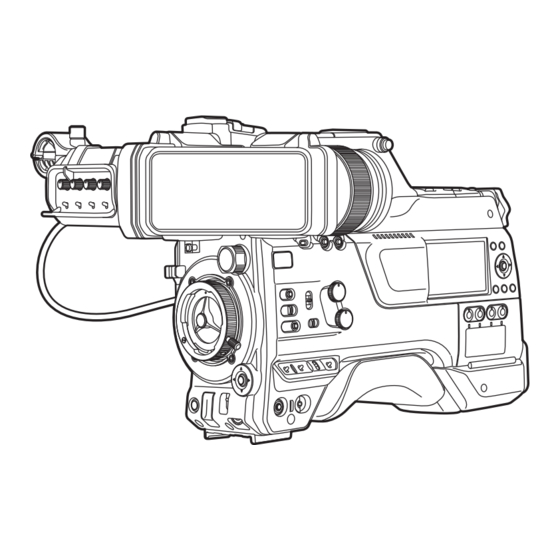
JVC Connected Cam GY-HC900CHE Instructions Manual (256 pages)
HD MEMORY CARD CAMERA RECORDER
Brand:
JVC
| Category:
Camcorder
| Size: 15.32 MB
Table of Contents
Safety Precautions
5
Table of Contents
11
Contents
11
Main Features
14
Precautions for Proper Use
16
Operation Modes
20
Names of Parts
22
Side Control Panel
24
Side Terminal Section
26
Rear Terminal
27
Electronic Viewfinder U V
28
Basic System Diagram
29
Settings and Adjustments before Use
30
Attaching the Lens (Sold Separately)
30
Attaching the Viewfinder (Supplied) U V
30
Attaching the Microphone (Sold Separately)
31
Attaching the Video Light (Sold Separately)
31
Attaching the Wireless LAN Antennas
32
(Supplied) U V
32
Attaching the Tripod (Sold Separately)
32
Adjusting the Position of the Shoulder Pad
32
Power Supply
33
Using AC Power (DC in Power)
33
Using a Battery Pack
34
Battery Warning Settings
35
Power Status Display
36
Turning On/Off the Power
37
Initial Settings
38
Displays on the LCD Monitor and Viewfinder
40
Display Screen
40
Status Screen
41
Remote Edit Mode Screen
41
Warning Display
41
Adjusting the LCD Monitor and Viewfinder
42
Adjusting the LCD Monitor
42
Adjusting the Viewfinder
42
Adjusting the Back Focus
44
Assignment of Functions to User Buttons
45
Tally Lamp
46
Recording Media
47
Usable Cards
47
Usable SSD Media
47
Estimated Recordable Time of SD Cards
47
Estimated Recordable Time of SSD Media
48
Inserting an SD Card
49
Removing the SD Card
49
Switching the SD Cards
50
Inserting the SSD Media Adapter (Sold Separately)
50
Formatting (Initializing) of Recording Media
51
Repairing the Recording Media
52
Clips Recorded to Recording Media
53
Operation Lock Feature
54
Shooting
55
Basic Shooting Procedures
55
Selecting System Definition, File Format and Video Format
56
Zoom Operation
59
Focus Operation
59
Adjusting the Brightness
60
Adjusting the Iris
61
Setting the Gain
62
Setting the Electronic Shutter
63
Adjusting the White Balance
65
Adjusting the Camera Image
70
Audio Recording
71
Audio Output During Recording
75
Time Code and User's Bit
75
Setting Time Code Generator
76
Setting the User's Bit
79
Synchronizing the Time Code with an External Time Code Generator
80
Setting Zebra Pattern
82
Setting Spot Meter
83
Acquiring Positioning Information by GPS V U
85
Viewing Recorded Videos Immediately (Clip Review)
86
Displaying the Video Signal Monitor
87
Recording Simultaneously at Two Different Definitions
88
Series Rec
88
Dual Rec
88
Backup Rec
90
Special Recording
92
Pre Rec
92
Clip Continuous Rec
93
Frame Rec
94
Interval Rec
95
Splitting the Clips Freely (Clip Cutter Trig)
96
Playing Recorded Clips
97
Thumbnail Screen
97
Actions
99
Playing Back
100
Deleting Clips
102
Appending/Deleting OK Mark
103
Selecting and Performing Operations on Multiple Clips
104
Selecting Multiple Clips Randomly
104
Selecting Multiple Clips Consecutively
105
Trimming Recorded Clips
106
Basic Operations in Menu Screen
107
Display and Description of the Menu Screen
108
Text Input with Software Keyboard
109
Menu Screen Hierarchical Chart
110
Camera Function Menu
111
User Switch Set Item
113
Full Auto Item
117
Camera Process Menu
118
Detail/Adjust Item
123
White Balance Item
124
TC/UB Menu
126
LCD/VF Menu
128
Shooting Assist Item
129
Marker Settings Item
131
Display Type Item
132
Display On/Off Item
133
A/V Set Menu
134
Video Set Item
134
Audio Set Item
138
Network Menu
143
Connection Setup Item
144
Live Streaming Item
145
Return over IP Item
149
Web Item
152
Metadata Server Item
152
Upload Item
153
Overlay Settings Menu
155
System Menu
157
Record Set Item
160
Adding/Editing Frequently Used Menu Items (Favorites Menu)
166
Adding Menu Items to Favorites Menu
166
Editing Favorites Menu
167
Display Screen in Camera Mode
170
Display Screen in Media Mode
176
Status Screen
179
Marker and Safety Zone Displays (Camera Mode Only)
181
Color Bar Output
182
Adjusting the Gamma
182
Adjusting Color Matrix
183
Configuring Setup Files
185
Saving Setup Files
186
Loading a Setup File
187
Deleting Setup Files
187
Connecting External Devices
188
Connecting External Monitor
188
Connecting a Remote Control Unit
189
Connecting the Headphone
190
Inputting External Synchronizing Signals (Genlock)
191
Displaying Return Videos from an External Device
193
Functions of Network Connection
194
Preparing Network Connection
195
Operating Environment
195
Camera Setup for Network Connection
195
Connecting to Network Via [LAN] Terminal
195
Connecting to Network Via [HOST] Terminal (USB)
196
U V
197
Importing Metadata
198
Preparing Metadata
198
Configuring the Server for Downloading
198
Importing Metadata
199
Uploading a Recorded Video Clip
200
Configuring the FTP Server for Uploading
200
Uploading Clips Automatically (Auto FTP)
200
Automatic Chunked Upload to FTP Server
201
Uploading Clips Manually (Manual FTP)
201
FTP Resume Feature
204
Connecting from a Web Browser
204
Editing Metadata
205
Planning Metadata
205
Clip Metadata
206
Uploading a Recording Clip Via a Web Browser
209
View Remote Control and Camera Control Functions
212
Changing the Settings Via a Web Browser
214
Changing View Remote Function Settings
215
Changing Connection Setup
215
Changing Metadata Server Settings
216
Changing Clip Server Settings
216
Changing Streaming Settings
216
Managing the Network Connection Settings File
217
Saving the Connection Settings File
217
Reading the Connection Settings File
218
Deleting Connection Settings
219
Performing Live Streaming
220
Setting Distribution
223
Starting Distribution
225
Setting the FEC Matrix
226
Return Video/Audio from the Network (Return over IP)
227
IFB (Return Audio)
228
Tagging Feature U W
229
Configuring to Exchange Format
229
Configuring Camera Angle Information
229
Entering Tag Information
229
Synchronizing GPS Time Code U
230
Broadcast Overlay
231
Importing and Configuring Settings for SDP Files for Broadcast
231
Displaying Watermark Images
233
Displaying Images on the Whole Screen (Full Screen Graphic Function)
233
Protecting Overlay Settings with a Password
235
Specifying Text and Images
236
Error Messages and Actions
237
List of FTP Transfer Errors
239
List of Live Streaming Error Displays
241
Blinking of the Tally Lamp
242
Warning Tone
242
Troubleshooting
243
Specifications
246
Appendix
251
Index
252
Software License Agreement
254
Important Notice Concerning the Software
255
Advertisement
JVC Connected Cam GY-HC900CHE Instructions Manual (236 pages)
Brand:
JVC
| Category:
Camcorder
| Size: 14.5 MB
Table of Contents
Safety Precautions
5
Table of Contents
11
Contents
11
Main Features
14
Precautions for Proper Use
16
Operation Modes
20
Names of Parts
22
Side Control Panel
24
Side Terminal Section
26
Rear Terminal
27
Electronic Viewfinder U V
28
Basic System Diagram
29
Settings and Adjustments before Use
30
Attaching the Lens (Sold Separately)
30
Attaching the Viewfinder (Supplied) U V
30
Attaching the Microphone (Sold Separately)
31
Attaching the Video Light (Sold Separately)
31
Attaching the Wireless LAN Antennas
32
(Supplied) U V
32
Attaching the Tripod (Sold Separately)
32
Adjusting the Position of the Shoulder Pad
32
Power Supply
33
Using AC Power (DC in Power)
33
Using a Battery Pack
34
Battery Warning Settings
35
Power Status Display
36
Turning On/Off the Power
37
Initial Settings
38
Displays on the LCD Monitor and Viewfinder
40
Display Screen
40
Status Screen
41
Remote Edit Mode Screen
41
Warning Display
41
Adjusting the LCD Monitor and Viewfinder
42
Adjusting the LCD Monitor
42
Adjusting the Viewfinder
42
Adjusting the Back Focus
44
Assignment of Functions to User Buttons
45
Tally Lamp
46
SD Card
47
Usable Cards
47
Estimated Recordable Time of SD Cards
47
Inserting an SD Card
48
Removing the SD Card
49
Switching the SD Cards
49
Formatting (Initializing) SD Cards
50
Restoring the SD Card
51
Clips Recorded to SD Cards
52
Operation Lock Feature
53
Shooting
54
Basic Shooting Procedures
54
Selecting System Definition, File Format and Video Format
55
Zoom Operation
57
Focus Operation
58
Adjusting the Brightness
59
Adjusting the Iris
60
Setting the Gain
61
Setting the Electronic Shutter
62
Adjusting the White Balance
63
Adjusting the Camera Image
69
Audio Recording
69
Audio Output During Recording
73
Time Code and User's Bit
73
Setting Time Code Generator
74
Setting the User's Bit
77
Synchronizing the Time Code with an External Time Code Generator
78
Setting Zebra Pattern
80
Setting Spot Meter
81
Acquiring Positioning Information by GPS V U
83
Viewing Recorded Videos Immediately (Clip Review)
84
Displaying the Video Signal Monitor
85
Recording Simultaneously at Two Different
86
Definitions 2
86
Series Rec
86
Dual Rec
86
Backup Rec 0
88
Special Recording 0
90
Pre Rec 0
90
Clip Continuous Rec 0
91
Frame Rec 1
92
Interval Rec 1
93
Splitting the Clips Freely (Clip Cutter Trig)
94
Playing Recorded Clips
95
Thumbnail Screen
95
Actions
97
Playing Back
98
Deleting Clips
100
Appending/Deleting OK Mark
101
Selecting and Performing Operations on Multiple Clips
102
Selecting Multiple Clips Randomly
102
Selecting Multiple Clips Consecutively
103
Trimming Recorded Clips
104
Basic Operations in Menu Screen
105
Display and Description of the Menu Screen
106
Text Input with Software Keyboard
107
Menu Screen Hierarchical Chart
108
Camera Function Menu
109
User Switch Set Item
111
Full Auto Item
115
Camera Process Menu
116
Detail/Adjust Item
121
White Balance Item
122
TC/UB Menu
124
LCD/VF Menu
125
Shooting Assist Item
126
Marker Settings Item
128
Display Type Item
129
Display On/Off Item
130
A/V Set Menu
131
Video Set Item
131
Audio Set Item
135
Network Menu
139
Connection Setup Item
140
Live Streaming Item
141
Return over IP Item 0
143
Web Item
145
Metadata Server Item
145
Upload Item 0
146
System Menu
148
Record Set Item
151
Adding/Editing Frequently Used Menu Items (Favorites Menu)
157
Adding Menu Items to Favorites Menu
157
Editing Favorites Menu
158
Display/Status Screen
161
Display Screen in Camera Mode
161
Display Screen in Media Mode
167
Status Screen
170
Camera Features
172
Marker and Safety Zone Displays (Camera Mode Only)
172
Color Bar Output
172
Adjusting the Gamma
173
Adjusting Color Matrix
174
Configuring Setup Files
176
Saving Setup Files
176
Loading a Setup File
177
Deleting Setup Files
178
Connecting External Devices
179
Connecting External Monitor
179
Connecting a Remote Control Unit
180
Connecting the Headphone
181
Inputting External Synchronizing Signals (Genlock)
182
Displaying Return Videos from an External Device
184
Connecting to the Network
185
Functions of Network Connection
185
Preparing Network Connection
186
Operating Environment
186
Camera Setup for Network Connection
186
Connecting to Network Via [LAN] Terminal 0
186
Connecting to Network Via [HOST] Terminal (USB) 0
187
U V 0
188
Importing Metadata
189
Preparing Metadata
189
Configuring the Server for Downloading
189
Importing Metadata
190
Uploading a Recorded Video Clip
191
Configuring the FTP Server for Uploading
191
Uploading Clips Automatically
191
Ftp)0
191
Uploading Clips Manually (Manual FTP)
192
FTP Resume Feature
194
Connecting from a Web Browser
195
Editing Metadata
195
Planning Metadata
195
Clip Metadata
196
Uploading a Recording Clip Via a Web Browser
199
Uploading a Recording Clip Via a Web Browser
200
View Remote Control and Camera Control Functions
202
Changing the Settings Via a Web Browser
204
Changing View Remote Function Settings
205
Changing Connection Setup
205
Changing Metadata Server Settings
206
Changing Clip Server Settings
206
Changing Streaming Settings
206
Managing the Network Connection Settings File
207
Saving the Connection Settings File
207
Reading the Connection Settings File
208
Deleting Connection Settings
209
Performing Live Streaming
210
Setting Distribution
212
Starting Distribution
214
Setting the FEC Matrix 0
215
Return Video/Audio from the Network
216
IFB (Return Audio)0
217
Error Messages and Actions
218
List of FTP Transfer Errors
219
List of Live Streaming Error Displays
221
Blinking of the Tally Lamp
222
Warning Tone
222
Troubleshooting
223
Specifications
226
Appendix
231
Index
232
Software License Agreement
234
Important Notice Concerning the Software
235
JVC Connected Cam GY-HC900CHE Instructions Manual (52 pages)
HD memory card camera recorder
Brand:
JVC
| Category:
Camcorder
| Size: 3.88 MB
Table of Contents
Safety Precautions
4
Table of Contents
10
Contents
10
Verifying the Accessories
10
Names of Parts
11
Settings and Adjustments before Use
14
Power Supply
17
Initial Settings
20
Adjusting the Back Focus
21
SD Card
22
Shooting
25
Basic Shooting Procedures
25
Playing Recorded Clips
26
Functions of Network Connection
27
Preparing Network Connection
28
Connecting to the Network
29
Connecting from a Web Browser
30
Menu Screen Hierarchical Chart
31
Basic Operations in Menu Screen
32
Display Screen in Camera Mode
33
Display Screen in Media Mode
38
Status Screen
40
Troubleshooting
41
Precautions for Proper Use
43
Specifications
47
Software License Agreement
50
Important Notice Concerning the Software
51
Advertisement
Advertisement
Related Products
JVC Connected Cam GY-HC900CHU
JVC Connected Cam GY-HC900STU
JVC Connected Cam GY-HC900RCHE
JVC GY-HC900
JVC Connected Cam GY-HC550E
JVC Connected Cam GY-HC550U
JVC Connected Cam GY-HC500SPCU
JVC GY-HC500UN
JVC GY-HC550UN
JVC CONNECTED CAM GY-HC500MC
JVC Categories
Car Receiver
Camcorder
TV
VCR
Stereo System
More JVC Manuals
Login
Sign In
OR
Sign in with Facebook
Sign in with Google
Upload manual
Upload from disk
Upload from URL