Sign In
Upload
Manuals
Brands
Cisco Manuals
Wireless Access Point
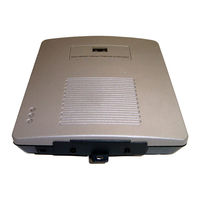
Aironet AIR-AP1220A
Cisco Aironet AIR-AP1220A Access Point Manuals
Manuals and User Guides for Cisco Aironet AIR-AP1220A Access Point. We have
3
Cisco Aironet AIR-AP1220A Access Point manuals available for free PDF download: Hardware Installation Manual, User Manual
Cisco Aironet AIR-AP1220A Hardware Installation Manual (160 pages)
Aironet 1200 Series Access Point
Brand:
Cisco
| Category:
Wireless Access Point
| Size: 4.64 MB
Table of Contents
Table of Contents
3
Preface
9
Audience
9
Purpose
9
Organization
9
Conventions
10
Related Publications
12
Obtaining Documentation
12
Cisco.com
13
Product Documentation DVD
13
Ordering Documentation
13
Documentation Feedback
14
Cisco Product Security Overview
14
Reporting Security Problems in Cisco Products
14
Obtaining Technical Assistance
15
Cisco Technical Support & Documentation Website
15
Locating the Product Serial Number
16
Submitting a Service Request
16
Definitions of Service Request Severity
17
Obtaining Additional Publications and Information
17
Chapter 1 Overview
19
Hardware Features
20
Dual-Radio Operation
20
Leds
21
Ethernet Port
21
Console Port
22
Power Sources
22
UL 2043 Certification
22
Anti-Theft Features
23
Network Configuration Examples
23
Central Unit in an All-Wireless Network
23
Root Access Point on a Wired LAN
24
Repeater Unit that Extends Wireless Range
25
Point-To-Point Bridge Configuration
25
Workgroup Bridge Configuration
26
Installing the Access Point
27
Chapter 2 Installing the Acces Point
28
Safety Information
28
FCC Safety Compliance Statement
28
General Safety Guidelines
28
Warnings
28
Unpacking the Access Point
29
Package Contents
29
Basic Installation Guidelines
29
Installation above Suspended Ceilings
30
Before Beginning the Installation
30
Installation Summary
32
Connecting the 2.4-Ghz Antennas
32
Connecting the 5-Ghz External Antennas
33
Connecting the Ethernet and Power Cables
34
Connecting to an Ethernet Network with an Inline Power Source
35
Connecting to an Ethernet Network with Local Power
35
Powering up the Access Point
36
Chapter 3 Configuring the Access Point for the First Time
36
Before You Start
38
Resetting the Access Point to Default Settings
38
Chapter 3 Configuring the Acces Point for the First Time
38
Using a Web-Browser
38
Using the Mode Button
38
Default IP Address Behavior
39
Obtaining and Assigning an IP Address
39
Connecting to the Access Point Locally
40
Assigning Basic Settings
40
Assigning Basic Settings
42
Default Settings on the Express Setup Page
44
Configuring Basic Security Settings
45
Understanding Express Security Settings
47
Using Vlans
47
Express Security Types
47
Express Security Limitations
48
Using the Express Security Page
49
Enabling the Radio Interfaces
45
Using a Telnet Session to Access the CLI
50
Using the Management Pages in the Web-Browser Interface
52
Using the Web-Browser Interface for the First Time
52
Assigning an IP Address Using the CLI
50
Chapter 4 Using the Web-Browser Interface
53
Using Action Buttons
54
Character Restrictions in Entry Fields
55
Using Online Help
55
CHAPTER 5 Using the Command-Line Interface5-1
58
Cisco IOS Command Modes
58
C H a P T E R 5 Using the Command-Line Interface
59
Getting Help
59
Abbreviating Commands
59
Using no and Default Forms of Commands
59
Understanding CLI Messages
60
Using Command History
60
Changing the Command History Buffer Size
60
Recalling Commands
61
Disabling the Command History Feature
61
Using Editing Features
61
Enabling and Disabling Editing Features
62
Editing Commands through Keystrokes
62
Editing Command Lines that Wrap
63
Searching and Filtering Output of Show and more Commands
64
Accessing the CLI
64
Opening the CLI with Telnet
64
Opening the CLI with Secure Shell
65
Chapter 6 Mounting Instruction
68
Mounting Instructions
68
Overview
68
Mounting on a Horizontal or Vertical Surface
69
Mounting below a Suspended Ceiling
70
Mounting above a Suspended Ceiling
71
Attaching the Access Point to the Mounting Bracket
73
Securing the Access Point to the Mounting Bracket
73
Chapter 7 2.4-Ghz Radio Upgrade
76
Upgrade Overview
76
Unpacking the Radio
76
Opening the Access Cover
77
Removing a Blank Spacer Card
78
Removing a 2.4-Ghz Radio
79
Installing a 2.4-Ghz Radio
81
Attaching the Compliance Labels
83
Placing the Labels
84
Finding the Software Version
84
Chapter 8 5-Ghz Radio Module Upgrade
86
Upgrade Overview
86
Unpacking the Radio Module
86
Removing the 5-Ghz Radio Access Cover
86
Removing a 5-Ghz Radio Module
87
Installing a 5-Ghz Radio Module
89
Attaching the Compliance Label
91
Finding the Software Version
92
Troubleshooting
93
Chapter 9 Troubleshooting
94
Checking the Top Panel Leds
94
Checking Basic Settings
96
Default IP Address Behavior
96
Default SSID and Radio Behavior
96
Enabling the Radio Interfaces
96
Ssid
97
WEP Keys
97
Security Settings
97
Running the Carrier Busy Test
97
Running the Ping or Link Test
98
Resetting to the Default Configuration
99
Using the MODE Button
99
Using the Web Browser Interface
100
Reloading the Access Point Image
100
Using the MODE Button
101
Web Browser Interface
101
Browser HTTP Interface
102
Browser TFTP Interface
102
Obtaining the Access Point Image File
103
Obtaining the TFTP Server Software
104
Appendix
105
Translated Safety Warnings
105
Appendix A Translated Safety Warning
106
Statement 245B-Explosive Device Proximity Warning
106
Statement 332-Antenna Installation Warning
107
Statement 1001-Work During Lightning Activity Warning
108
Statement 1004-Installation Instructions Warning
109
Statement 1005-Circuit Breaker (20A) Warning
110
Appendix
113
Declarations of Conformity and Regulatory Information
113
A P P E N D I X B Declarations of Conformity and Regulatory Information
114
Manufacturers Federal Communication Commission Declaration of Conformity Statement
114
Department of Communications-Canada
115
Canadian Compliance Statement
115
European Community, Switzerland, Norway, Iceland, and Liechtenstein
116
Declaration of Conformity with Regard to the R&TTE Directive 1999/5/EC
116
Declaration of Conformity for RF Exposure
118
Guidelines for Operating Cisco Aironet Access Points in Japan
118
Japanese Translation
118
English Translation
119
Administrative Rules for Cisco Aironet Access Points in Taiwan
119
Access Points with IEEE 802.11A Radios
119
Chinese Translation
119
All Access Points
120
Chinese Translation
120
English Translation
120
Operation of Cisco Aironet Access Points in Brazil
121
Access Point Model
121
Regulatory Information
121
Portuguese Translation
121
English Translation
121
Declaration of Conformity Statements
122
Declaration of Conformity Statements for European Union Countries
122
Declaration of Conformity
128
Appendix
131
Access Point Specifications
131
Appendix
137
Channels and Antenna Settings
137
Channels
137
IEEE 802.11B (2.4-Ghz Band
138
IEEE 802.11G (2.4-Ghz Band
139
IEEE 802.11A (5-Ghz Band
140
Maximum Power Levels and Antenna Gains
142
Appendix
149
Console Cable Pinouts
149
Overview
150
Console Port Signals and Pinouts
150
G L O S S a R y
151
I N D E X
157
Advertisement
Cisco Aironet AIR-AP1220A Hardware Installation Manual (138 pages)
Aironet 1200 Series Access Point
Brand:
Cisco
| Category:
Wireless Access Point
| Size: 3.71 MB
Table of Contents
Table of Contents
3
Preface
9
Audience
9
Organization
9
Conventions
10
Related Publications
12
Locating the Product Serial Number
13
Chapter 1 Overview
15
Product Terminology
15
Autonomous Access Points
15
Lightweight Access Points
16
Guidelines for Using 1200 Series Lightweight Access Points
17
Hardware Features
17
Dual-Radio Operation
18
Leds
19
Ethernet Port
19
Console Port
20
Power Sources
20
UL 2043 Certification
20
Anti-Theft Features
20
Network Examples with Autonomous Access Points
21
Root Access Point on a Wired LAN
22
Repeater Unit that Extends Wireless Range
23
Central Unit in an All-Wireless Network
24
Bridge Network with Wireless Clients
24
Point-To-Point Bridge Configuration
25
Workgroup Bridge Network
25
Network Example with Lightweight Access Points
26
Installing the Access Point
28
Chapter 2 Installing the Acces Point
29
Warnings
29
Safety Information
29
FCC Safety Compliance Statement
29
General Safety Guidelines
29
Unpacking the Access Point
30
Package Contents
30
Basic Installation Guidelines
31
Controller Discovery Process for Lightweight Access Points
31
Before Beginning the Installation
32
Deploying the Access Points on the Wireless Network
34
Connecting the 2.4-Ghz Antennas
35
Connecting the 5-Ghz External Antennas
35
Connecting the Ethernet and Power Cables
36
Connecting to an Ethernet Network with an Inline Power Source
37
Connecting to an Ethernet Network with Local Power
37
Mounting Instructions
39
Chapter 3 Mounting Instruction
40
Overview
40
Mounting on a Horizontal or Vertical Surface
41
Mounting below a Suspended Ceiling
42
Mounting above a Suspended Ceiling
43
Attaching the Access Point to the Mounting Bracket
46
Securing the Access Point to the Mounting Bracket
46
Chapter 4 Upgrading the 2.4-Ghz Radio
48
Upgrade Overview
48
Unpacking the Radio
48
Opening the Access Cover
49
Removing a Blank Spacer Card
50
Removing a 2.4-Ghz Radio
51
Installing a 2.4-Ghz Radio
53
Attaching the Compliance Labels
55
Placing the Labels
56
Upgrade Overview
58
Chapter 5 Upgrading the 5-Ghz Radio Module
58
Unpacking the Radio Module
58
Removing the 5-Ghz Radio Access Cover
58
Removing a 5-Ghz Radio Module
59
Installing a 5-Ghz Radio Module
61
Attaching the Compliance Label
63
Chapter 6 Troubleshooting Autonomous Access Points
65
Checking the Top Panel Leds
66
Checking Basic Settings
68
Default IP Address Behavior
68
Default SSID and Radio Behavior
68
Enabling the Radio Interfaces
68
Ssid
69
Running the Carrier Busy Test
69
Security Settings
69
WEP Keys
69
Running the Ping or Link Test
70
Resetting to the Default Configuration
71
Using the MODE Button
71
Using the Web Browser Interface
72
Reloading the Access Point Image
72
Using the MODE Button
73
Browser HTTP Interface
74
Web Browser Interface
74
Browser TFTP Interface
75
Obtaining the Access Point Image File
75
Obtaining the TFTP Server Software
76
Connecting to the Access Point Locally
77
CHAPTER 7 Troubleshooting Lightweight Access Points
80
Guidelines for Using 1200 Series Lightweight Access Points
80
Using DHCP Option 43
80
Checking the Top Panel Leds
81
Manually Configuring Controller Information Using the Access Point CLI
83
Configuring Controller Information
83
Clearing Manually Entered Controller Information
83
Manually Resetting the Access Point to Defaults
84
Returning the Access Point to Autonomous Mode
84
Using a Controller to Return the Access Point to Autonomous Mode
84
Using the MODE Button to Return the Access Point to Autonomous Mode
85
MODE Button Setting
85
Obtaining the Autonomous Access Point Image File
86
Obtaining the TFTP Server Software
87
Connecting to the Access Point Locally
87
Appendix
89
Translated Safety Warnings
89
Appendix
91
Declarations of Conformity and Regulatory Information
91
Manufacturers Federal Communication Commission Declaration of Conformity Statement
92
Industry Canada
94
VCCI Statement for Japan
94
Canadian Compliance Statement
94
European Community, Switzerland, Norway, Iceland, and Liechtenstein
95
Declaration of Conformity with Regard to the 1999/5/EC (R&TTE Directive
95
Declaration of Conformity for RF Exposure
97
Guidelines for Operating Cisco Aironet Access Points in Japan
98
Japanese Translation
98
English Translation
98
Administrative Rules for Cisco Aironet Access Points in Taiwan
99
Access Points with IEEE 802.11A Radios
99
Chinese Translation
99
English Translation
99
All Access Points
100
Chinese Translation
100
English Translation
100
Operation of Cisco Aironet Access Points in Brazil
101
Access Point Models
101
English Translation
101
Portuguese Translation
101
Regulatory Information
101
Declaration of Conformity Statements
102
Declaration of Conformity Statements for European Union Countries
102
Appendix
113
Access Point Specifications
113
Appendix
119
Channels and Maximum Power Levels
119
Appendix
120
Appendix
121
Console Cable Pinouts
121
Overview
121
Console Port Signals and Pinouts
121
Appendix
123
A P P E N D I X F Priming Lightweight Access Points Prior to Deployment
124
Priming Lightweight Access Points Prior to Deployment
123
Configuring DHCP Option 43 for Lightweight Access Points
127
Overview
128
A P P E N D I X G Configuring DHCP Option 43 for Lightweight Access Points
128
Configuring Option 43 for 1000 Series Access Points
128
Configuring Option 43 for 1100, 1130, 1200, 1240, and 1300 Series Lightweight Access Points
129
G L O S S a R y
131
I N D E X
137
Cisco Aironet AIR-AP1220A User Manual (36 pages)
Aironet 1100/1200 series
Brand:
Cisco
| Category:
Wireless Access Point
| Size: 0.27 MB
Table of Contents
Unpacking the Radio
3
1100 Series Installation Instructions
4
Preparing the Access Point and Work Area
4
Removing the Back Cover
5
Removing the 2.4-Ghz Radio
6
Installing the 802.11G Radio
10
Replacing the Back Cover
13
Configuring the 802.11G Radio
14
1200 Series Installation Instructions
14
Opening the Access Cover
16
Removing the Blank Spacer Card
17
Removing a 2.4-Ghz Radio
20
Installing the 802.11G Radio Card
22
Attaching the Compliance Labels
25
Placing the Labels
27
In Case of Difficulty
29
Safety Information
30
Compliance Information
31
Cisco One-Year Limited Hardware Warranty Terms
32
Advertisement
Advertisement
Related Products
Cisco AIR-AP1220B-A-K9 - Aironet 1200 - Wireless Access Point
Cisco AIR-AP1220B-E-K9-RF - Aironet 1220 - Wireless Access Point
Cisco AIR-AP1220B-E-K9 - Syst. 802.11B AP
Cisco Aironet AIR-AP1220B
Cisco AIR-AP1231G-E-K9 - 54Mbps Wireless Access Point
Cisco AIR-AP1242AG-N-K9
Cisco Aironet AIR-AP1252G-A-K9
Cisco AIR-AP1242AG-I-K9
Cisco AIR-AP1242G
Cisco Aironet AIR-AP1252AG-C-K9
Cisco Categories
Switch
IP Phone
Network Router
Wireless Access Point
Network Hardware
More Cisco Manuals
Login
Sign In
OR
Sign in with Facebook
Sign in with Google
Upload manual
Upload from disk
Upload from URL