Sign In
Upload
Manuals
Brands
Canon Manuals
Camcorder
MV 3 MC
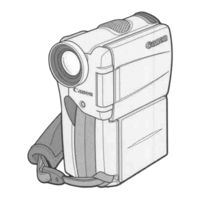
Canon MV 3 MC Digital Video Camcorder Manuals
Manuals and User Guides for Canon MV 3 MC Digital Video Camcorder. We have
1
Canon MV 3 MC Digital Video Camcorder manual available for free PDF download: Instruction Manual
Canon MV 3 MC Instruction Manual (147 pages)
Brand:
Canon
| Category:
Camcorder
| Size: 5.9 MB
Table of Contents
Safety Warning
2
Contents
3
Accessories
4
Features
5
Parts Overview
6
Remote Control
8
Powering up
9
Connecting the Camera to a Mains Outlet
9
Charging and Attaching the Battery Packs
10
Compact Power Adapter
11
Loading a Cassette
12
Cassette Unloading
12
Protecting Tapes from Accidental Erasure
13
Handling Cassettes
13
Basic Recording
14
When You Have Finished Recording
15
Changing the Recording Mode (SP/LP)
16
16:9 (Widescreen TV Recording)
16
Confirmation/Warning Beeps
17
About the Power Dial Lock Lever
17
Zooming
18
Using the LCD Screen
19
Changing the Angle of the LCD Screen
19
Adjusting the LCD Screen
20
Allowing the Subject to Monitor Recording
21
Playing Back a Cassette
22
Playback Pause
23
Fast Forward Playback
23
Rewind Playback
23
Special Playback
24
Frame Advance/Reverse
24
Slow Forward Playback/Slow Reverse Playback
24
Forward/Reverse X2 Playback
24
Built-In Speaker
25
Connections for Playback on a TV Screen
26
Attaching the Docking Unit
26
If Your TV (or VCR) Has a SCART Terminal (Without S (S1)-Video)
27
If Your TV (or VCR) Has an S (S1) -Video Input Terminal
28
If Your TV (or VCR) Has Audio/Video Input Terminals
29
Tips for Making Better Videos
30
Holding the Camera
30
Using a Tripod
30
Composition
30
Picture Angle
31
Camera Moves
31
Turning the Image Stabilizer off
32
Using the Menus
33
Selecting from the Menus
34
List of Menus
36
Using the Wireless Controller/Tally Lamp
42
Inserting Batteries
42
When Operating 2 Canon DV Camcorders (Remote Sensor Mode)
43
Turning off the Tally Lamp
44
If Your Wireless Controller Isn't Working
44
Setting the Date and Time
45
Setting the Time Zone/Daylight Saving Time
45
Setting the Clock
47
Date and Time Display
47
Recording in Progressive Scan Mode
48
Taking Still Pictures to a Cassette
49
Transferring Still Pictures to a PC with the FR-100
51
Searching and Reviewing While Recording
52
Record Search
52
Record Review
52
Using the Various Recording Programs
53
Setting the Program AE Mode
54
Easy Recording
55
Auto
55
Sports
55
Portrait
55
Spotlight
56
Sand and Snow
56
Low Light
56
Using Digital Effects
57
Faders
59
Fade Trigger (FADE-T)
59
Wipe
59
Scroll/Mosaic Fade (M. FADE)
59
Effects
60
Art
60
Black and White (BLK & WHT)
60
Sepia/Mosaic
60
Operating Faders
61
Select Fader
61
Fader On/Off
61
Operating Effects
62
Select Effect
62
Effect On/Off
62
Using the Multi-Image Screen
63
Operating the Multi-Image Screen
63
Multi-Image Screen On/Off
64
Audio Recording
65
Selecting the Audio Mode
65
External Microphone and Headphones
65
Wind Screen
66
Setting the Self-Timer
67
Adjusting Exposure Manually
69
Exposure Lock
69
Exposure Adjustment
69
Shutter Speed
70
Recommended Shutter Speeds When Shooting
71
Adjusting Focus Manually
72
Focus Lock
72
Manual Focus
72
Setting the White Balance
73
Displaying Date, Time and Camera Data (Data Code)
75
Selecting Date/Time
75
Setting the Data Code
76
Possible Data Code Combinations
76
Six-Second Auto Date
77
Searching the Tape (Photo Search/Date Search)
78
Returning to a Pre-Marked Position
79
Editing to a VCR
80
LANC Terminal
80
Dubbing with Digital Video Equipment
81
Copyright Signal
83
Recording over Existing Scenes - A/V Insert Editing
84
Audio Dubbing
87
To Connect an External Microphone
87
Setting the Audio MIX
90
Selecting Audio Output Channels
91
Multimediacard Introduction
92
Inserting and Removing the Multimediacard
93
Selecting the Recording Image Quality
93
File Numbers
95
Turning the Shutter Sound off
96
Recording Still Images to a Multimediacard
97
Recording an Image from a Cassette as a Still Image
99
Recording from Another TV Device as a Still Image
100
Viewing Still Images
101
Single Image
101
Slide Show
102
Index
102
Preventing Accidental Erasure (Protect)
103
Erasing Still Images
104
To Erase All Images on the Multimediacard at Once
105
Combining Images and Recording Them to a Cassette (Card MIX)
106
CARD CHROMA (Card Chroma Key)
106
CARD LUMI (Card Luminance Key)
106
CAM. CHROMA (Camera Chroma Key)
107
MIX Level
107
Copying Still Images from a Cassette
109
Copying MMC Still Images to a Cassette
110
Marking a Still Image for Printing (Print Mark)
111
Formatting a Multimediacard
112
Multimediacard Operating Precautions
113
Sample Images
114
Multimediacard Specifications
115
Preparing the Camera
116
Adjust the Viewfinder
116
Prepare the Lens Cap
116
Fasten the Grip Belt
116
Notes on Using the Batteries
117
Charging and Recording Times
117
How Much Power Is Left?
117
When to Recharge
118
Taking Care of the Battery Pack
118
Installing the Backup Battery
119
Maintenance
120
Storage
121
Viewfinder Care
121
LCD Care
121
Video Heads Care
121
Using the Camera Abroad
122
Condensation
123
Troubleshooting
124
The MV3/MV3 MC/Mv3I/Mv3I MC System Diagram
128
Optional Accessories
129
Maximum Recording Time
129
Screen Displays
132
Turning off the LCD Screen Displays
132
Caution Phrases
137
Specifications
139
Alphabetical Index
140
Menu at a Glance
143
Advertisement
Advertisement
Related Products
Canon MV 3 i
Canon MV 300 i
Canon MV 30
Canon MV300i
Canon MV3
Canon MV3i
Canon MV3i MC
Canon MV30i
Canon MV6i MC
Canon MV730
Canon Categories
Printer
Digital Camera
All in One Printer
Camcorder
Scanner
More Canon Manuals
Login
Sign In
OR
Sign in with Facebook
Sign in with Google
Upload manual
Upload from disk
Upload from URL