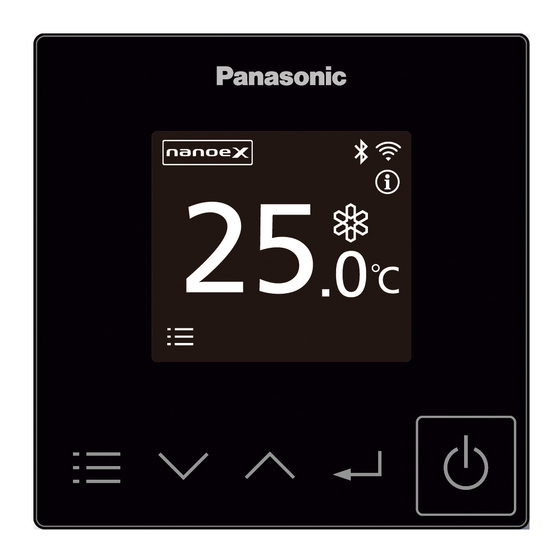
Panasonic CZ-RTC6 Installation Instructions Manual
Wired remote controller
Hide thumbs
Also See for CZ-RTC6:
- Installation instructions manual (80 pages) ,
- Operating instructions manual (32 pages) ,
- Operating instructions manual (94 pages)
Advertisement
Quick Links
ENGLISH
Read through the Installation Instructions before you proceed with the installation.
In particular, please carefully read the "Safety Precautions".
Model No.
Safety Precautions ........................... 2
Part Names (Control panel) .................. 4
Dimensions ....................................... 4
Installation Precautions ..................... 5
Mounting .......................................... 6
Setting ............................................. 9
.......................................... 11
Installation Instructions
Wired Remote Controller
CZ-RTC6
CZ-RTC6W
................................. 11
WEB-ACXF60-38393-EN
W1020-20423
Page
Advertisement

Summary of Contents for Panasonic CZ-RTC6
-
Page 1: Table Of Contents
Installation Instructions Wired Remote Controller CZ-RTC6 Model No. CZ-RTC6W Page Safety Precautions ……………………… 2 Part Names (Control panel) ……………… 4 Dimensions ………………………………… 4 Installation Precautions ………………… 5 Mounting …………………………………… 6 Setting ……………………………………… 9 Test run ……………………………………... -
Page 2: Safety Precautions
NOTICE The English text is the original instructions. Other languages are translations of the original instructions. Safety Precautions Read before installation Read the Installation Instructions carefully to install the remote controller correctly and safely. Be sure to read the “Safety Precautions” before installation. ... - Page 3 CAUTION Do not use the remote controller at the following locations. • Location where condensation occurs • Location where fl ammable gases, etc. may leak • Location where corrosive gases, etc. may leak • Location with lots of water or oil droplets ...
-
Page 4: Part Names (Control Panel)
Part Names (Control panel) The control panel colour of CZ-RTC6W is white. 1) LCD screen 2) Menu button ● When pressed repeatedly during operation, this shows operating status confi rmation, set temperature, operation mode, fan speed, fl ap, and the menu screen. 4) Enter button ●... -
Page 5: Installation Precautions
Installation Precautions Installation location Install at the height of 1 to 1.5 m from the fl oor (Location where average room temperature can be detected). 50 mm Install vertically against a wall or suitable supporting structure. Keep a space around the remote controller as detailed on 50 mm 50 mm the fi... -
Page 6: Mounting
After installation, set one remote controller to [Main] and the other to [Sub] for [Main/sub] for “Setting”. (See “Setting” section - “RC. setting mode”) When using the remote controllers* in combination, set the CZ-RTC6(CZ-RTC6W) unit to [Sub]. *CZ-RTC5B, CZ-RTC6BL(CZ-RTC6WBL) Note Remote controllers can be connected to any indoor unit for operation. - Page 7 Mount to the wall. There are 2 types of wall-mounting methods: Exposed type and Embedded type. Attention Mounting the bottom case Tighten the screws securely until the screw heads touch the bottom case. (Otherwise, loose screw heads may hit the PCB and cause malfunction when mounting the top case.) ...
- Page 8 Embedded type A protective fi lm is attached on the Control panel. Mount the top case. Mount the bottom case to ● Align the claws of the top Pass the wire under the rib. Pass the wire under the rib. the wall.
-
Page 9: Setting
Setting Preparation: Turn on the circuit breaker of units and then turn the power on. The remote controller starts, and wait until the [Assigning] display disappears. (If [Assigning] continues to blink for 10 minutes or more, check the address setting of indoor units. - Page 10 Auto address Set. ( Select the Code no. [A1] and O/D unit no.) Code no. Press → . (Repeat) O/D unit no. Press After Selecting [YES], the unit restarts. Code no. O/D unit no. Set the Auto address for each O/D unit no. •...
-
Page 11: Test Run
Do not use this mode for purposes other than the test operation. (To prevent overload of the units) Read the Installation Instructions supplied with the units. Specifi cations Model No. CZ-RTC6 / CZ-RTC6W Dimensions (H) 86 mm × (W) 86 mm × (D) 25 mm Weight 0.09 kg 0 ˚C to 40 ˚C / 20 % to 80 %... - Page 12 Panasonic Corporation http://www.panasonic.com WEB-ACXF60-38393-EN © Panasonic Corporation 2020-2023 W1020-20423...


