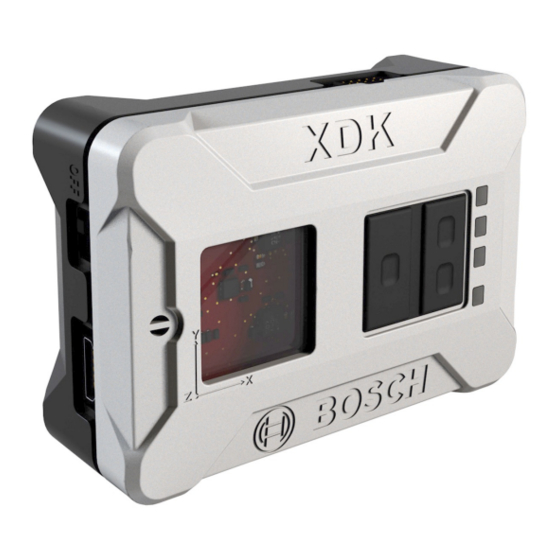
Bosch XDK110 Connection Manual
Connect device to your azure iot services
Hide thumbs
Also See for XDK110:
- General information manual (53 pages) ,
- Quick start manual (25 pages) ,
- Getting started (24 pages)
Table of Contents
Advertisement
Quick Links
Advertisement
Table of Contents

Summary of Contents for Bosch XDK110
- Page 1 Connect XDK110 device to your Azure IoT services 1 | 16 Connect XDK110 device to your Azure IoT services Document Revision V1.0.0 Document Release Date 12-17-2020 Data subject not change without notice | Printed in Germany | December 2020 BCDS...
-
Page 2: Table Of Contents
Connect XDK110 device to your Azure IoT services 2 | 16 Contents 1 Introduction 2 Before you start 3 Overview 4 Steps to follow 4.1 Create Azure IoT Central application ........................3 4.2 Create X.509 certificates ............................. 3 4.3 Create enrollment group and verify root X.509 certificate .................. 4 4.4 Customize and publish device template ...................... -
Page 3: Steps To Follow
The AzurePlugAndPlay application is aimed at simplifying the development of your IoT solutions. Through this application you will be able to access the data from all built-in sensors of XDK110 and get the luxury of easy connectivity with Azure using X.509 certificates. This application will enable you to select which all sensors to be enabled, at what time they needs to be sampled, at what time the mean value of sampled data should be send to Azure. -
Page 4: Create Enrollment Group And Verify Root X.509 Certificate
Connect XDK110 device to your Azure IoT services 4 | 16 ('azure-iot-test-only.root.ca.cert.pem') 4.2.3 Run the command below to create root CA and intermediate "./certs/". certificate within a new subfolder ./certGen.sh create_root_and_intermediate 4.2.4 Replace the <> section with a device name of your choice and run the following command to create X.509 device certificate and private key pair. - Page 5 Connect XDK110 device to your Azure IoT services 5 | 16 4.3.3.1 Once the group details are saved, you will be able to scroll down and select the option 'Manage Primary'. This will open 'Primary Certificate' pop up screen certificate 4.3.3.2 Click Browse icon and specify the path to X.509 root...
- Page 6 Connect XDK110 device to your Azure IoT services 6 | 16 4.3.4. Save the changes to the enrollment group by clicking on 'Save' Data subject not change without notice | Printed in Germany | December 2020 BCDS...
-
Page 7: Customize And Publish Device Template
4.4.1.4. After a few seconds, you can see your new device template If XDK110 was not on the list, you can also make use of the DCM in the workbench to create a custom template by selecting 'IoT device' instead of XDK110. Please find the latest DCM at 'https://devicemodels.azure.com/dtmi/bosch/xdk110-1.expanded.json' which can be imported as the device model. -
Page 8: Update Configuration File
Connect XDK110 device to your Azure IoT services 8 | 16 4.4.4 Publish device template 4.4.4.1. Select the Publish button 4.4.4.2. On the Publish this device template to the application dialog, select Publish. 4.4.4.3. After you publish a device template, it will be visible on the Devices page. -
Page 9: Keep The Configuration File And Credentials In Sd Card
Connect XDK110 device to your Azure IoT services 9 | 16 4.5.2. Update wlan section 4.5.2.1. Update the value of ssid with SSID of the WiFi network to be connected to 4.5.2.2. Update the value of password with the password to the WiFi network Please remember to keep the details within double quotes. -
Page 10: Flash The Application To Your Device And Get Connected
Please keep in mind that this step is only needed if your XDK doesn't carry the AzurePlugAndPlay application already. 4.7.1.1. Open the XDK Workbench 4.7.1.2. Connect your XDK110 device to the Workbench through USB or JLink. 4.7.1.3. Import the 'AzurePlugAndPlay' application from the XDK-Examples 4.7.1.4. Build the project and flash the device The application is expected to run, soon after flashing your device. - Page 11 Connect XDK110 device to your Azure IoT services 11 | 16 4.7.3.4. Select the 'Overview' page to view the incoming data from your device. Please keep in mind that at times it might take few seconds to represent the data as graphs.
- Page 12 Connect XDK110 device to your Azure IoT services 12 | 16 4.7.3.7. The 'About' window will give you the device informations such as the WLAN MAC Address, Software Version etc. 4.7.3.8. You can make use of the 'Raw Data' page(get generated by default) to checkout the raw data traffic as well.
-
Page 13: Additional Details: Connecting To Iot Hub
Connect XDK110 device to your Azure IoT services 13 | 16 Additional details: Connecting to IoT Hub For connecting your device with IoT Hub you will need to make use of device provisioning service(DPS) as well. 4.8.1. Follow the steps discussed in the page... - Page 14 Connect XDK110 device to your Azure IoT services 14 | 16 4.8.5. Update the idScope detail in the config.json with ID scope of your DPS service. You can get the ID scope of DPS from 'Overview' tab. Rest of the details in config.json can be kept as such from section 5.
-
Page 15: Additional Details: Connecting To Azure Iot Explorer
Connect XDK110 device to your Azure IoT services 15 | 16 4.9 Additional details: Connecting to Azure IoT Explorer Azure IoT Explorer is a graphical tool for interacting with and devices connected to your IoT hub. Thus please follow the steps as mentioned in section 8 and then follow the steps mentioned in the link https://docs.microsoft.com/en-us/azure/iot-... - Page 16 Connect XDK110 device to your Azure IoT services 16 | 16 Bosch Connected Devices and Solutions GmbH Ludwig-Erhard-Straße 2 72760 Reutlingen Germany Data subject not change without notice | Printed in Germany | December 2020 BCDS...


