Advertisement
Quick Start Guide
Thank you for purchasing the Samsung DVR Security System.
Follow the simple steps in this guide to set up and start using your new security system.
If you have any questions or need help installing your new product, please contact our free technical support.
Telephone: 00800-801-08022 (Toll-free)
9am - 4pm CET, Monday - Friday
Web : http//www.hanwha-security.eu/home-security/
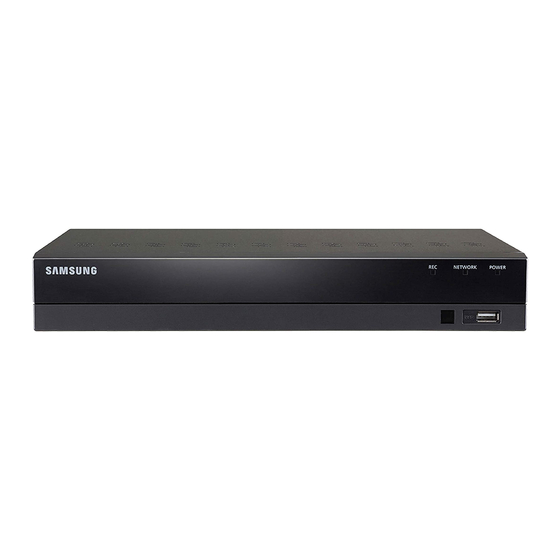
❒ Front
❒ Back
1
3
AUDIO
2
INPUT
8
Part Name
Audio output
1
Video input
2
VGA port
3
LAN: Network port
4
Power port
5
USB port
6
HDMI
7
Audio input
8
SAMSUNG ALL-IN-ONE SECURITY SYSTEM
1
2
1
3
5
7
AUDIO
VIDEO
4
2
4
6
8
HDMI
OUTPUT
INPUT
Audio signal output, RCA port
Connect with CH1-8 (analog) video input device, standard BNC port
Connect to VGA monitor
Connect with LAN, Ethernet and RJ45 port
Connect to the power supply, DC12V 2A, included with the system
Connect to USB mouse or device
Connect to HDMI monitor
Connect with CH1-4 audio input signals, RCA port
REC
NET
PWR
USB
3
4
LAN
12V
VGA
7
6
Function
SDH-B74041/SDH-B74081
5
KIT MODEL
DVR MODEL
SDR-B74301
_1
English
Advertisement
Table of Contents

Summary of Contents for Samsung SDR-B74301
- Page 1 SDR-B74301 SAMSUNG ALL-IN-ONE SECURITY SYSTEM Thank you for purchasing the Samsung DVR Security System. Follow the simple steps in this guide to set up and start using your new security system. If you have any questions or need help installing your new product, please contact our free technical support.
-
Page 2: Startup Wizard
Startup Wizard After DVR startup is completed, the startup wizard will be displayed. Wizard setting menu includes: • Homepage • Admin password setting • Hard drive management • Video recording schedule • Basic system configuration • Network setup • E-mail setting • DDNS setting You can click on "Don't show this window next time"... - Page 3 Basic System Configuration- You can set date, time, date format, time format, language, video format and menu timeout. Network Setup (DHCP). In DHCP mode, the router will automatically allo- cate IP address to the DVR. If the DVR fails to obtain an IP address, refer to the DVR User Manual and Router Guide.
- Page 4 DDNS SETTING. User may set DDNS under network type of PPPoE/ Static/DHCP after applying dynamic domain service. User may remotely access DVR through domain by using browser in the form of http://ap- plied domain: mapped HTTP port number when using DDNS domain name to access DVR.
-
Page 5: Main Interface
Date & Time Display current date and time Channel Name Display channel name SAMSUNG Logo The logo of SAMSUNG will display only when video is loss. Image Capture Make a snapshot of current video Manual Recording Enable or disable manual recording... -
Page 6: Network Settings
Component Name Function Nine-Channel Layout Display nine channels of video. Display six channels of video. N-Channel Layout Display eight channels of video. Polling Start or stop polling. Sound Adjust volume or mute. Playback Replay video recorded & Network Settings • DNS: DNS is usually provided by local ISP. Enter the IP address of your domain name server. • UPnP (Plug and Play): function of automatic upload from port. -
Page 7: Web Application Manager
Select PPPoE for direct dial-up in the following procedure: Enter Client port. Enter HTTP port (which must be different from Client port). Enter user name and password for PPPoE, which are provided by network operator. Enter DNS (domain name server) address. Click on "Save"... - Page 8 Download and installation of plugin for IE Enter IP address plus HTTP port of the DVR in the address bar of IE, for example, http://192.168.2.173:80. Click "Download" and then "Run" to begin downloading the file. When you see the dialog box, "Do you want to run this software?", click on "Run". Click on "Install"...
- Page 9 Download and installation of plugin for Mac SAFARI Enter the IP address and HTTP port for the DVR in the address bar of Mac SAFARI browser. For example, http://192.168.2.173:80, and click on "Download" to download the plugin. Locate the downloaded plugin "SurveillanceClient.dmg" and double click on it. Install the plugin by double clicking on "SurveillanceClient.pkg".
-
Page 10: Web Application Manager Login
Close your Mac Safari browser and restart it. Enter the IP address and HTTP port for the DVR in the address bar to access login page. The above instruction is to install the initial plugin. You can use the same plugin for IE, for Google Chrome and Firefox. -
Page 11: Mobile App
Mobile App ❒ Android Phones/Tablets Open Play Store to search for WiseView and click "INSTALL". After installation, open WiseView and select "Device". Then click [ ] to add new device. Scan QR code under Information page. Then input client port, user name and password, and then click Save to log into the DVR. - Page 12 ❒ iPhone/iPad Open App Store to search for WiseView, and click icon [ ] to install. Open WiseView, and go to Device. Click [ ] to add new device. Scan QR code under Information page. Then input client port, user name and password, and then click Save to log into the DVR. 12_ English...
-
Page 13: Camera Front
Camera Installation Template To make camera installation easier, you can tear off this page and adhere it to the place you would like to install your cameras. TEMPLATE This template is used to install the camera on the wall Screw holes for the Camera installation CAMERA FRONT... - Page 14 MEMO...


