Table of Contents
Advertisement
Quick Links
Advertisement
Table of Contents

Summary of Contents for Electrolux KIV644
- Page 1 User Manual KIV644 electrolux.com/register...
-
Page 2: Table Of Contents
WE’RE THINKING OF YOU Thank you for purchasing an Electrolux appliance. You’ve chosen a product that brings with it decades of professional experience and innovation. Ingenious and stylish, it has been designed with you in mind. So whenever you use it, you can be safe in the knowledge that you’ll get great results every time. - Page 3 installation or usage. Always keep the instructions in a safe and accessible location for future reference. 1.1 Children and vulnerable people safety This appliance can be used by children aged from 8 years • and above and persons with reduced physical, sensory or mental capabilities or lack of experience and knowledge if they have been given supervision or instruction concerning the use of the appliance in a safe way and understand the...
-
Page 4: Safety Instructions
CAUTION: The cooking process has to be supervised. A • short term cooking process has to be supervised continuously. WARNING: Danger of fire: Do not store items on the • cooking surfaces. Metallic objects such as knives, forks, spoons and lids •... - Page 5 • Seal the cut surfaces with a sealant to • Make sure not to cause damage to the prevent moisture from causing swelling. mains plug (if applicable) or to the mains • Protect the bottom of the appliance from cable. Contact our Authorised Service steam and moisture.
- Page 6 2.4 Care and cleaning from the power supply. This to prevent an electrical shock. • Clean the appliance regularly to prevent • Users with a pacemaker must keep a the deterioration of the surface material. distance of minimum 30 cm from the •...
-
Page 7: Installation
Find the video tutorial "How to install your Electrolux Induction Hob - Worktop installation" by typing out the full name indicated in the graphic below. ENGLISH... -
Page 8: Product Description
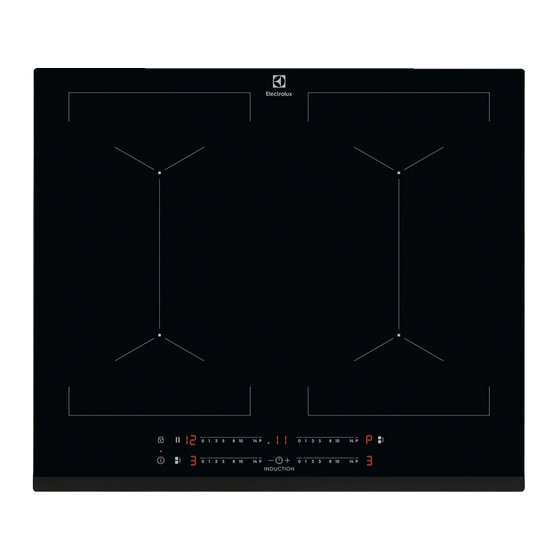
How to install your Electrolux Induction Hob - Worktop installation 4. PRODUCT DESCRIPTION 4.1 Cooking surface layout Induction cooking zone Control panel 4.2 Control panel layout Use the sensor fields to operate the appliance. The displays, indicators and sounds tell which functions operate. - Page 9 Sensor Function Comment field Pause To activate and deactivate the function. Bridge To activate and deactivate the function. Heat setting display To show the heat setting. Timer indicators of cooking zones To show for which zone you set the time. Timer display To show the time in minutes.
-
Page 10: Daily Use
4.4 OptiHeat Control (3 step the residual heat for the cooking zones you are currently using. Residual heat indicator) The indicator may also appear: WARNING! • for the neighbouring cooking zones even if you are not using them, As long as the •... - Page 11 cookware must cover the centres of both To activate the function for a cooking zones but not go beyond the area marking. If zone: touch comes on). Immediately the cookware is located between the two touch a desired heat setting. After 3 seconds centres, Bridge function will not be activated.
- Page 12 remaining time counts down to 00. The The function does not stop the timer indicator of the cooking zone disappears. functions. When the countdown ends, an Touch to activate the function. acoustic signal sounds and 00 comes on. The heat setting is lowered to flashes.
-
Page 13: Hints And Tips
5.12 OffSound Control reaches the limit of maximum available power within one phase, the power of the (Deactivating and activating the cooking zones will be automatically sounds) reduced. • The heat setting of the cooking zone Deactivate the hob. Touch for 3 seconds. - Page 14 • water boils very quickly on a zone set to • whistle sound: you use a cooking zone the highest heat setting. with a high power level and the cookware • a magnet pulls on to the bottom of the is made of different materials (a sandwich cookware.
-
Page 15: Care And Cleaning
Heat setting Use to: Time Hints (min) 9 - 12 Gentle fry: escalope, veal cordon bleu, as neces‐ Turn halfway through. cutlets, rissoles, sausages, liver, roux, sary eggs, pancakes, doughnuts. 12 - 13 Heavy fry, hash browns, loin steaks, 5 - 15 Turn halfway through. - Page 16 Problem Possible cause Remedy You do not set the heat setting for Activate the hob again and set the 10 seconds. heat setting in less than 10 seconds. You touched 2 or more sensor fields Touch only one sensor field. at the same time.
-
Page 17: Technical Data
Centres are in the guarantee booklet. corner of the glass surface) and an error 9. TECHNICAL DATA 9.1 Rating plate Model KIV644 PNC 949 599 189 00 Typ 61 B4A 04 AA 220 - 240 V / 400 V 2N 50 - 60 Hz Induction 7.35 kW... - Page 18 Lenght (L) and width (W) of the cooking area Left L 39.2 cm W 22.0 cm Lenght (L) and width (W) of the cooking area Right L 39.2 cm W 22.0 cm Energy consumption of the cooking area (EC electric Left 183.9 Wh / kg cooking)
- Page 20 electrolux.com...


