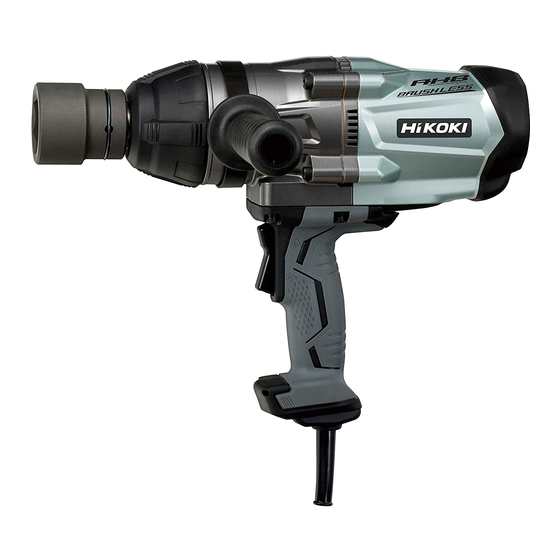
Hitachi WR 25SE Service Manual
Hide thumbs
Also See for WR 25SE:
- Handling instructions manual (8 pages) ,
- Instruction manual and safety instructions (44 pages)
Advertisement
Quick Links
PRODUCT NAME
Hitachi Impact Wrench
WR 25SE
Model
CONTENTS
REPAIR GUIDE ----------------------------------------------------------------------------------------------------------------- 1
1. Precautions on disassembly and reassembly ------------------------------------------------------------- 1
STANDARD REPAIR TIME (UNIT) SCHEDULE ----------------------------------------------------------------------10
LIST No.
LIST No.
WR 25SE: E730
xxx. 2014
Jan. 2015
Overseas Sales Division
W
Advertisement

Summary of Contents for Hitachi WR 25SE
- Page 1 LIST No. LIST No. WR 25SE: E730 xxx. 2014 Jan. 2015 PRODUCT NAME Hitachi Impact Wrench WR 25SE Model CONTENTS REPAIR GUIDE ----------------------------------------------------------------------------------------------------------------- 1 1. Precautions on disassembly and reassembly ------------------------------------------------------------- 1 STANDARD REPAIR TIME (UNIT) SCHEDULE ----------------------------------------------------------------------10 Overseas Sales Division...
- Page 2 1. Precautions on disassembly and reassembly [Bold] numbers in the description below correspond to the item numbers in the Parts List and exploded assembly diagram for the Model WR 25SE. Disassembly 1. Disassembly of handle (A).(B) set and its vicinity (1) Removal of handle (A).(B) set...
- Page 3 2. Removal of hammer spring (C) Using a hand press, push down the raised portions of Hammer (D) [11] to compress Hammer Spring (C) [17] fully. In this position, use a small flat-blade screwdriver to extract the two Steel Balls D10.3 [13] from the cam grooves of Spindle (C) [20] and Hammer (C) [14].
- Page 4 3. Disassembly of the motor unit (1) Removal of rotor ass’y (C) Remove Rotor Ass’y (C) [30] together with Inner Cover (C) [27] from Housing (C) [34]. NOTE: Keep the removed Rotor Ass’y (C) [30] away from iron or other metal because Rotor Ass’y (C) [30] has a magnetic force.
- Page 5 4. Removal of the switch Remove the four Screws M3.5 x 5 [39] and remove the Switch [38]. Fig. 5 • Removal of the switch [39] [38] [33] [42] [43] [42] [46] [47] [43] [48]...
- Page 6 5. Disassembly of the power supply unit Remove the four Screws M3.5 x 5 [39] from the Switch [39]. Fig. 6 • Disassembly of the power supply unit Sensor PCB ass’y Internal wire (black) [42] Internal wire (white) Internal wire (red) [43] Noise suppressor PCB ass’y Main PCB ass’y...
- Page 7 Reassembly Perform reassembly by reversing the disassembly procedure. However, special attention should be given to the following items. 1. Reassembly of the power supply unit and its vicinity (1) Perform wiring according to the connecting diagram on page 9 when replacing the Switch [38] or Stator Controller (C) Set [33] with new one.
- Page 8 (5) Mount Washer (B) [11] to Anvil (C) [12]. Apply a small amount of grease to the two Needle Rollers [22] and mount it to Ring Gear (C) [23]. NOTE: Be careful of the direction of Washer (B) [11]. Fig. 8 • Reassembly of the main body Mount Washer (B) [11] with its chamfered side toward the anvil.
- Page 9 Application of lubricant (1) Apply Nippeco SEP-3A grease (Code No. 930035 (100 g)/930038 (2.5 kg)) to the following: • Pinion tooth flanks of Rotor Ass’y (C) [30] • Tooth flanks of the Ring Gear [23] • Two Needle Rollers [19] •...
- Page 10 No-load current After no-load operation for 30 minutes, the no-load current value should be as follows. Voltage 110 V 120 V 220 V 230 V 240 V Current max. 3.5 A 3.5 A 1.5 A 1.5 A 1.5 A Connecting diagram Fig.
- Page 11 STANDARD REPAIR TIME (UNIT) SCHEDULE Variable MODEL 60 min. Fixed Work Flow WR 25SE Housing (C) Stator Controller Handle Switch (C) Set (A).(B) Set Cord Cord Armor Rotor Ass'y (C) Ball Bearing (6001DD) Ball Bearing (608VV) Inner Cover (C) General Assembly...
- Page 12 LIST NO. E730 IMPACT WRENCH 2015 · 1 · 20 Model WR 25SE (E1)
- Page 13 PARTS WR 25SE ITEM DESCRIPTION REMARKS CODE NO. USED 986491 SEAL LOCK HEX. SOCKET HD. BOLT M6 X 50 932916 HANGER (B) 932915 HANGER (A) 993126 SEAL LOCK SCREW (W/SP. WASHER) M5 X 12 337836 BUMPER (C) 337835 HAMMER CASE (C) ASS'Y INLCLUD.5,7,8...
- Page 14 PARTS WR 25SE ITEM DESCRIPTION REMARKS CODE NO. USED 959140 CONNECTOR 50091 (10 PCS.) 500247Z CORD (CORD ARMOR D8.8) 500423Z CORD (CORD ARMOR D8.8) FOR MAL, SIN (230V),UAE (230V) 323974 CORD (CORD ARMOR D10.1) FOR TPE, SIN (110V),UAE (110V) 500234Z CORD (CORD ARMOR D8.8) FOR INA,IND...
- Page 15 STANDARD ACCESSORIES WR 25SE ITEM CODE NO. DESCRIPTION REMARKS USED 338503 CASE 338347 SIDE HANDLE ASS'Y INCLUD.503-506 330209 SIDE HANDLE 323775 HANDLE HOLDER 338502 HANDLE RING 980903 SQUARE BOLT M8 - 4 - *ALTERNATIVE PARTS Printed in Japan 1 - 15...


