Table of Contents
Advertisement
Quick Links
Advertisement
Table of Contents

Summary of Contents for Philips DC199B/12
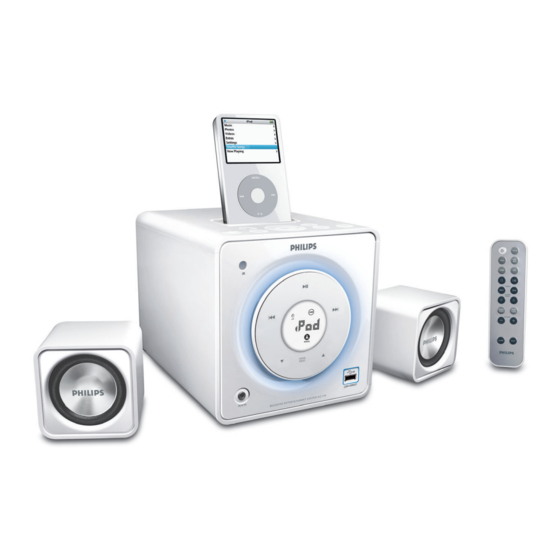
- Page 1 Docking Entertainment System Register your product and get support at www.philips.com/welcome User manual Manuel d'utilisation Manual de usuario Benutzerhandbuch Gebruikershandleiding Manuale dell'utente Användarhandbok Brugervejledning Käyttöopas Manual do usuário DC199 DC199B...
- Page 2 The Performer’s Protection Acts 1958 to 1972. Italia DICHIARAZIONE DI CONFORMITA’ Si dichiara che l’apparecchio DC199/DC199B Philips risponde alle prescrizioni dell’art. 2 comma 1 del D.M. 28 Agosto 1995 n. 548. Fatto a Eindhoven Philips Consumer Electronics 5616 JB Eindhoven, The Netherlands Norge Typeskilt finnes på...
- Page 3 Front panel view Top panel view...
- Page 5 Index English ------------------------------------------------ 6 Français -------------------------------------------- 22 Español --------------------------------------------- 38 Deutsch --------------------------------------------- 54 Nederlands ---------------------------------------- 70 Italiano ---------------------------------------------- 86 Svenska ------------------------------------------- 102 Dansk --------------------------------------------- 118 Suomi --------------------------------------------- 134 Português ---------------------------------------- 150 ----------------------------------------- 166...
-
Page 6: Table Of Contents
Contents General Information Environmental Information ... 7 Supplied accessories ... 7 Safety Information ... 7 Hearing Safety ... 7 Preparations Rear connections ... 8 Connecting a USB device or memory card ... 9 Connecting other equipment to your system ... 9 Before using the remote control ... -
Page 7: General Information
Congratulations on your purchase and welcome to Philips! To fully benefit from the support that Philips offers, register your product at www.philips.com/ welcome. This product complies with the radio interference requirements of the European Community. Environmental Information All unnecessary packaging has been omitted. We... -
Page 8: Preparations
Preparations Rear connections The type plate is located at the rear of the system. For users in the U.K.: please follow the instructions on page 2. Power ● Before connecting the AC power adaptor to the wall outlet, ensure that all other connections have been made. -
Page 9: Connecting A Usb Device Or Memory Card
Optional connections The optional equipment and connecting cords are not supplied. Refer to the operating instructions of the connected equipment for details. Connecting a USB device or memory card By connecting a USB mass storage device (including USB flash memory, USB flash players or memory cards) to the system, you can enjoy the device's stored music through the powerful speakers of system. -
Page 10: Main Unit
Controls (illustrations on page 3) Main unit – remote sensor ÉÅ – (iPod/USB) starts or interrupts playback. iPod/ USB ... fast searches back and forward within a track (press and hold)..skips to the beginning of a current/previous/next track. CLOCK ... -
Page 11: Remote Control
Remote Control – switches on the system to the last sound source played. – switches the system to standby mode. iPod – selects the sound source for your iPod player. TUNER – selects the sound source for FM radio. 9 (USB devices only) –... -
Page 12: Basic Functions
Basic Functions Important! Before you operate the system, complete the preparation procedures. Switching the system on ● Press STANDBY -ON B (or B on the remote control). ➜ The system will switch to the last selected source. ● Press either USB/AUX, iPod or TUNER on the system /remote control. -
Page 13: Usb Playback Functions
Different play modes: SHUFFLE and REPEAT You can select and change the various play modes before or during playback. The REPEAT modes can also be combined with PROGRAM. To select your play mode, press REPEAT/ SHUFF before or during playback until the display shows the desired function. -
Page 14: Radio Reception
Radio Reception Tuning to radio stations Press TUNER to select the tuner source. Hold and then release the button. ➜ The system will start searching for a radio station with sufficient signal strength. Repeat step 2 if necessary until you find the desired station. -
Page 15: External Sources
Using a non-USB device Connect the audio out terminals of the external equipment (TV, VCR, Laser Disc player, DVD player or CD Recorder) to the AUX IN socket of your system. Press USB/AUX to select external equipment. Note: – Refer to the operating instructions of your connected equipment for details. - Page 16 External Sources Supported formats: – USB or memory file format FAT12, FAT16, FAT32 (sector size: 512-4096 bytes) – MP3 bit rate (data rate): 32-320 Kbps and variable bit rate – WMA v9 or earlier – Directory nesting up to a maximum of 8 levels –...
-
Page 17: Clock/Sleep Timer
Clock setting The clock uses the 24-hour mode. In standby mode, press PROG/CLOCK for more than two seconds. ➜ The clock digits flash. Press ALBUM/PRESET 3 4 to set the minutes. Press to set the hours. Press PROG/CLOCK to confirm the time. Setting the Alarm Time ●... - Page 18 Clock/Sleep Timer Note: – If you press SLEEP again, this will change your sleep time period to the next shorter preset option. To deactivate the sleep timer ● Press SLEEP repeatedly until "0FF" is displayed, or press STANDBY ON 2.
-
Page 19: Ipod Dock
Compatible iPod players ● The docking entertainment system is compatible with all the existing Apple iPod models with 30- pin connector. Selecting the correct dock adaptor ● Four adapters are included to fit different iPod models including iPod touch (8GB, 16GB), iPod classic (80GB, 160GB), iPod nano 3rd generation (4GB, 8GB), iPod the 5th generation (30GB, 60GB, 80GB), iPod nano 2nd generation (2GB,... -
Page 20: Specifications
Specifications AMPLIFIER Output power ..2 x 7.5W (satellite), 15W (sub-woofer) Signal-to-noise ratio ... ≥ 70 dBA Frequency response ... 50 Hz – 20 KHz, ± 3 dB Input sensitivity AUX ... 0.5 V (max. 2 V) Impedance loudspeakers .. -
Page 21: Troubleshooting
Do not open the system as there is a risk of electric shock. If a fault occurs, first check the points listed below before taking the system for repair. If you are unable to remedy a problem by following these hints, consult your dealer or Philips for help.


