Table of Contents
Advertisement
Advertisement
Table of Contents

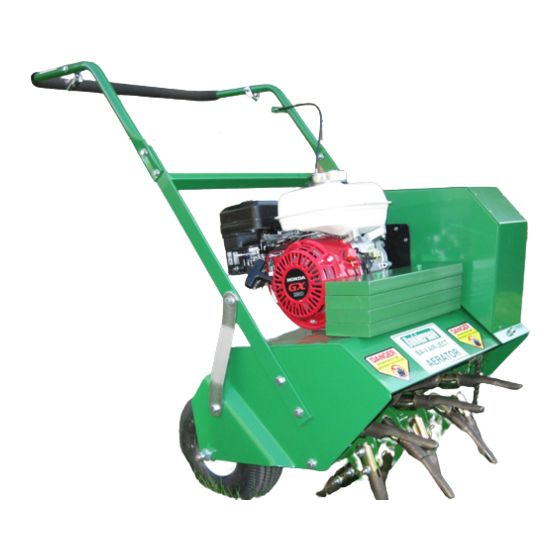
Summary of Contents for bannerman BA-4 AIR-JECT
- Page 1 BA-4 AIR-JECT AERATOR OPERATOR’S MANUAL & PARTS BREAKDOWN...
-
Page 2: Table Of Contents
TABLE OF CONTENTS 1. Cover Page 2. Table of Contents 3. Welcome to Bannerman 4. Declaration of CE Conformity 5. Warranty Statement 6. Work Safely! 7. Specifications 8. Assembly 9. Clutch Adjustment 10. Tine Installation 11. Engine & Operation 12. Service & Lubrication 13. -
Page 3: Welcome To Bannerman
Dear Owner, Welcome to Bannerman, the Home of Sports Turf Magic. Your new BA-4 Air-Ject Aerator is designed to improve your total grooming performance. The ease of operation and low maintenance will give you many trouble free hours of operation. -
Page 5: Warranty Statement
No charges for expense incurred in parts, labour or transportation, by unauthorized persons will be allowed under this warranty. Bannerman Ltd. reserves the right to request the return of any part or Bannerman assembly (with transportation charges prepaid) claimed to be covered under this warranty. -
Page 6: Work Safely
WORK SAFELY – FOLLOW THESE RULES!! A CAREFUL OPERATOR IS THE BEST INSURANCE AGAINST AN ACCIDENT!! Be sure to pay proper attention to these instructions concerning your personal safety. Be sure to observe and follow these instructions. Warning: Before handling any equipment, read this operation manual. 1. -
Page 7: Specifications
SPECIFICATIONS Power Supply OVH Four Stroke Honda Gasoline/Petrol Engine Transmission Engine Reduction Box Ratio – 6:1 Fuel Unleaded Engine Oil 10W40 Weight: 250 lbs. (109 Kg) Working Width: 18 Inches (45 cm) Vibration: Dominant Axis 8.7m/sec2 Recommended tire pressure 8 PSI Noise Reading at Operator Station (A)Weighted sound pressure 84.9 dB (A) -
Page 8: Assembly
ASSEMBLY 1. Install the lower handle to the main frame using 8 of the 3/8” X 1” bolts, 8 of the 3/8” nuts and 16 of the 3/8” flat washers which are provided. Tighten later. 2. Install the lower handle support bars – tighten fasteners on either side of the handle. Tighten all nuts and bolts securely. -
Page 9: Clutch Adjustment
CLUTCH ADJUSTMENT The BA-4 Air-Ject Aerator is equipped with a belt tightening clutch. 1. Squeeze the clutch control bar up towards the handle as far as possible. This causes the idler pulley to press down and tighten the V-belt. Proper tension is obtained when the belt does not slip when the tines are placed in the ground. -
Page 10: Tine Installation
TINE INSTALLATION Tines are supplied in the carton. (25 Core Tines, 25 Slitter Slicer, or 18 Fracture Tines). These are attached to the 5 disc reel as follows: 1. Attach the tines to the reel using the bolts and nuts provided – check direction of tines and tighten securely. -
Page 11: Engine & Operation
ENGINE Proper engine operation and maintenance instructions have been provided with this unit by the engine manufacturer. It is important to read and maintain this manual. Engine difficulty, if any, should be reported to an authorized engine manufacturers’ service centre. Warranty of this engine and engine accessories are also provided by the engine manufacturer. - Page 12 SERVICE Before attempting any maintenance or removal of the guards, stop the engine, switch off the fuel supply and remove the spark plug lead from the spark plug. Two 6mm nuts and bolts hold the metal belt guard in place. Fit only genuine components to this machine.
-
Page 14: Parts List
BA-4 AIR-JECT AERATOR PARTS LIST Ref. # Part No. Description 08069 Tine Reel Assembly (CT & S/S) 08089 Handle - Upper 08090 Bar - Handle Clutch 02082 Grip - Upper Handle 08096 Clevis - Ball End 08091 Cable - Clutch... -
Page 15: Parts List
BA-4 AIR-JECT AERATOR PARTS LIST Ref. # Part No. Description 08086 U-Bolt - 3/8 - 16 08040 Pulley - Idler 08068 Chain Assembly with Connecting Link 02033 Nut, Hex 3/8 - 13 08094 Cover - Safety Chain 03013 Screw 1/4 - 20 X 3/4 Hex Head Cap...